My style can be described as being bright, fun, non-traditionalist, hippy and boho, and my Christmas decorations really embrace my style. I’m not a huge fan of tinsel or traditional Christmas decorations, though I do add elements of the traditional into my decor.
I have Christmas trees, fairy lights and stags,but not in traditional colourways, I prefer white or black trees, my stag decorations are bright pink and glittery, instead of tinsel I choose bead ropes, marabou feathers and pom-pom trim. I have really bright baubles on my black tree and have chosen little dinosaurs to hang from my other, scroll down to see the photos that I have taken of my non-traditionalist, seasonal decor!
I didn’t want to hang my wreath on the front door because, well, its Wales and it rains! Not just that but I really didn’t want to get him all dirty either. I hung my wreath on the next available door – the door to my downstairs living room.
Joy lights which I have placed on the shelving unit opposite the door to my living room. This is the first thing people see when coming into my home.
My small tree that I have decorated with multi-colour fairy lights, pom-pom trim, marabou feather trim and tiny plastic dinosaurs!
Here’s a close up of the dinosaurs!
My second tree which is decorated with beaded ropes and baubles.
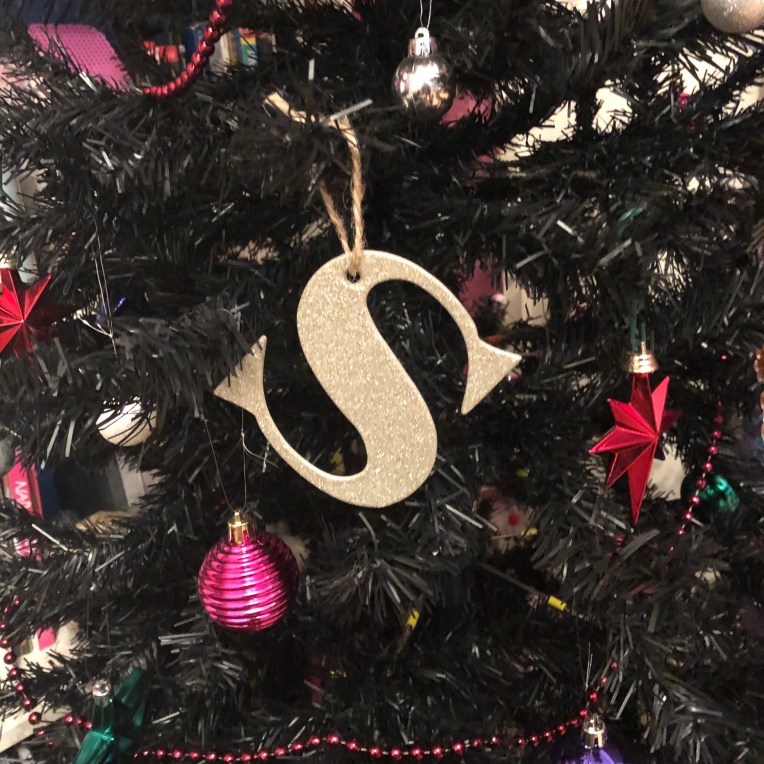
A close up of one of the decorations on my black Christmas tree – my initial!
Pink stars, green stars and purple stars also adorn the tree.
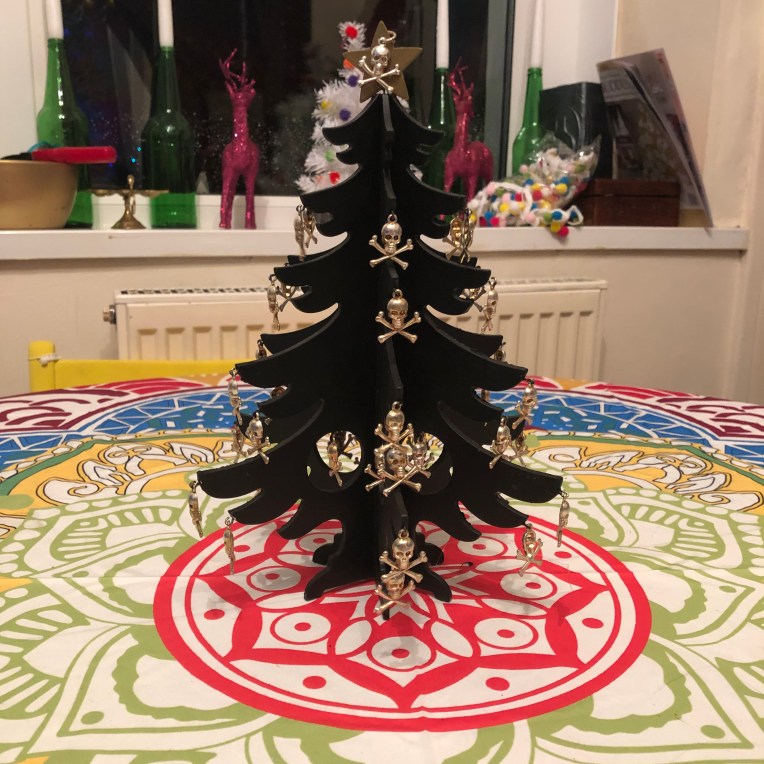
Skull and Crossbone upcycled tree which I’m thinking of having as my table piece for Christmas dinner.
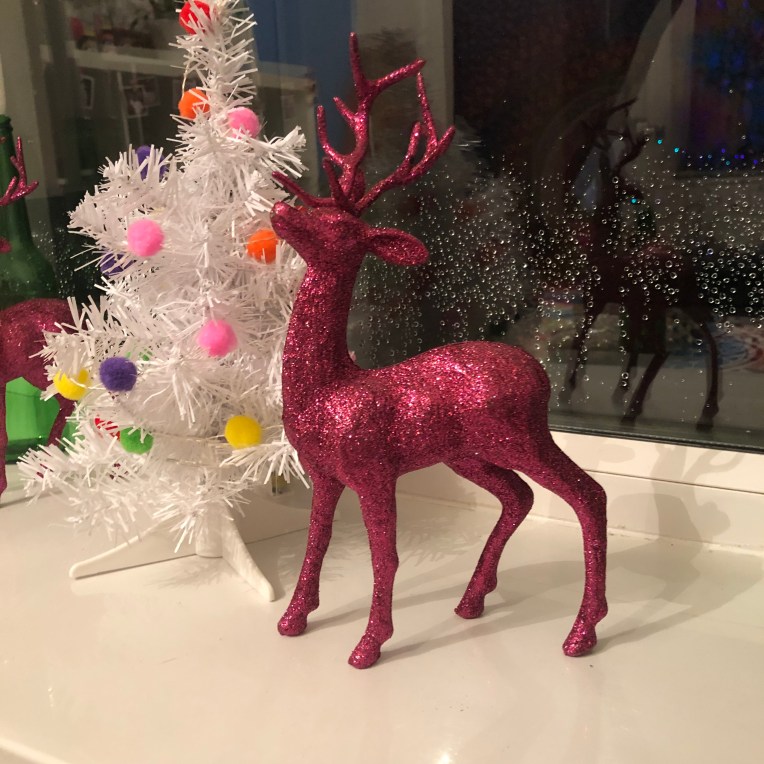
My pink glitter stags, my mini Christmas Tree and its pom-pom decorations (which are also lights!) on my back windowsill.
Here’s a close up of one of the stags! I’m really liking the effect the rain on the window has!
And lastly, my santa card peg fairy light garland.
How have you decorated your house for christmas? Do you have a theme or colour palette that you use?
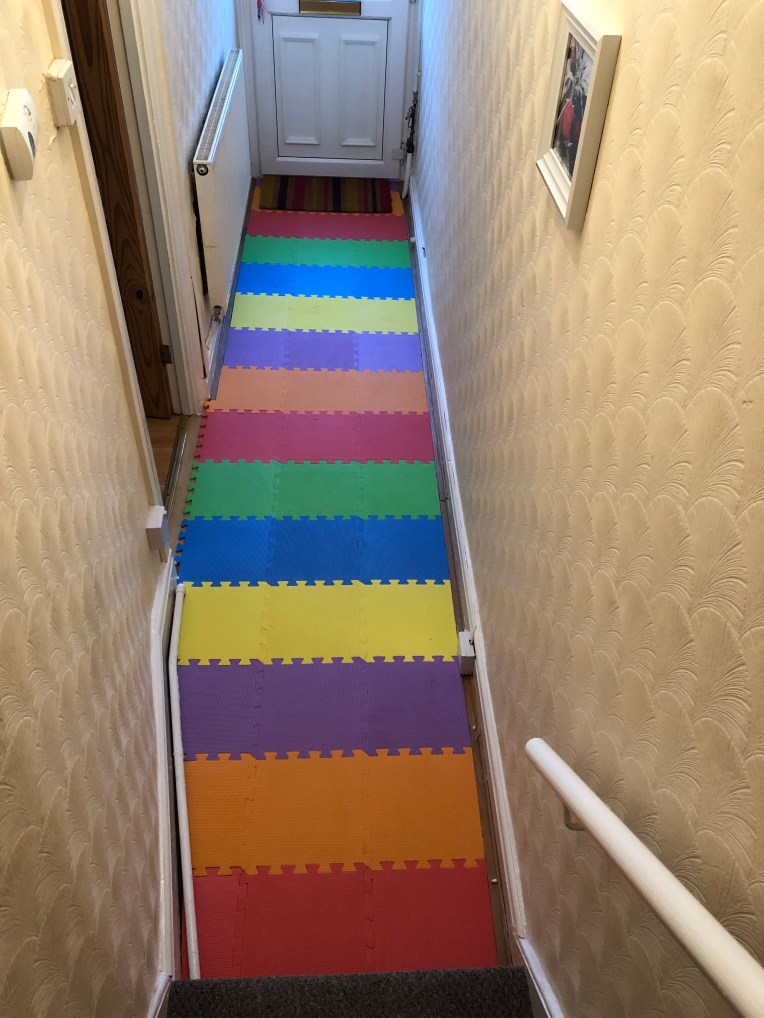
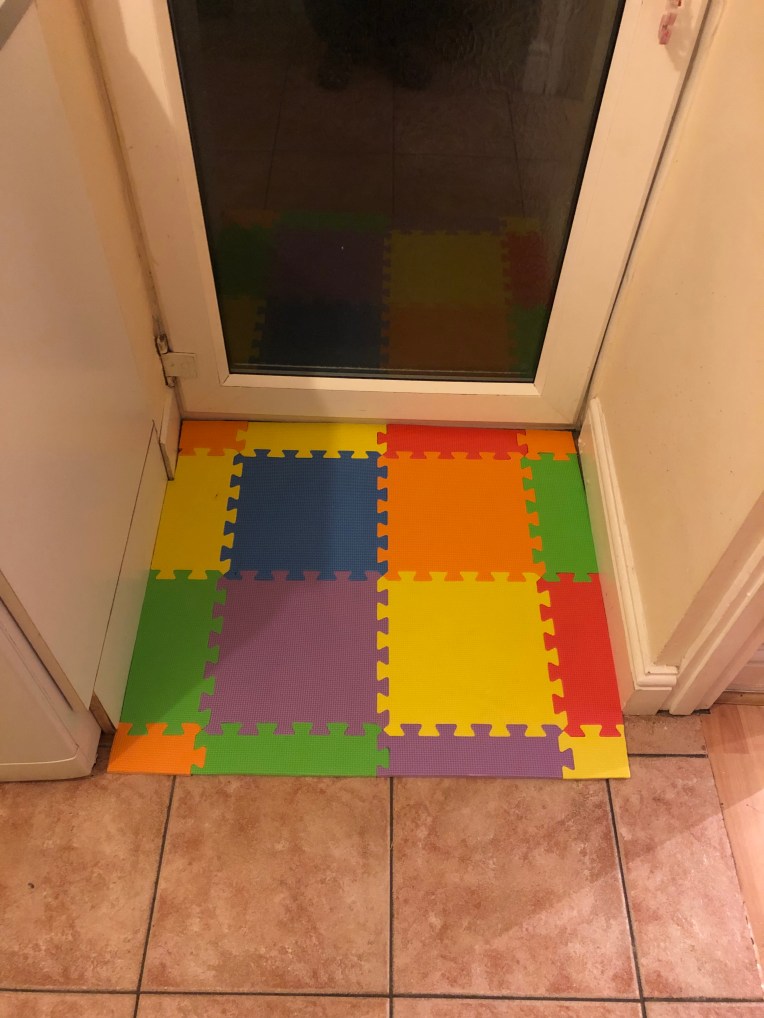
The hallway in my house had laminate wood flooring which hadn’t been laid very well, was a bit battered and never seemed to look clean which always irked me somewhat. I really wanted to cover it with something as I was unable to remove it due to being rented accommodation.
I looked everywhere for a hall runner rug that would fit the 4 meter 10cm length and that would also fit width ways. The hallway starts off wide at the door and becomes narrow toward the foot of the stairs which made it awkward to find something suitable that would work well. The cost of the cheapest rug that I found was around £80 and came in really mundane solid colours – brown, grey and a golden colour, and most of the others I found I didn’t really like the pattern or colour of in a higher price bracket. There was nothing that I truly loved that fitted my style, that is until I started thinking about other types of flooring.
My first thought was carpet tiles as they were pretty cheap to buy and easy to fit too but, being a hallway I thought that might be a bit impractical with dirt being bought in from outside. I then thought about vinyl flooring as it is hard-wearing and can be cleaned really easily but the patterns that were available were not really anything that I liked. I wanted something bright, fun, easy to install, easy to keep clean, and even easier to replace if I needed to for whatever reason, it also needed to fit my budget. It was when I started to rethink over getting carpet tiles that a thought occurred to me… I knew what would fit my specifications perfectly and would be a pretty unique choice for flooring…kids soft foam play area tiles!
This is the outcome! I ordered these from here. When they arrived I opened up the packets and went about sorting them into colours before starting on laying them down.
I prepped the floor by sweeping and hoovering to get up every last bit of dust and dirt, I didn’t want to cause any further damage to the laminate underneath so this was a vital step.
I then chose the colour scheme I wanted, choosing to place the coloured tiles together to create a stripe effect and placed the first tile at the foot of the stairs and worked my way back towards the door. I then removed the first tile I had laid and cut one of the edge flat, removing the “teeth” before placing it back down and shuffling the tiles up so the cut edge butted up against the rise of the step.
The next cut I made was the tile to go against the door. Once I’d got this row in I was able to work my way back up towards the stairs and remove the teeth from the side closest to the wall and move the tiles into place. I then added the next row which just needed the teeth removing from both ends.
The third row was the trickiest as I needed to cut down some of the tiles to fit the shape of the wall so that the tiles fitted snugly without any room for movement. To do this I took each tile, laid it over the tiles that were there and made marks where the teeth and tile met. The tricky part to this is to remember to make the marks on the opposite side of the tile to where you are measuring otherwise you will end up with the cut going in the wrong direction… so mark the left side of the tile to be cut with the right side of the tile that is already in place. Be sure to put the tile fully against the wall before making the mark too!
Once all the tiles were in place the only thing I needed to do was to finish the edge near the doorway, this was fairly simple as I was working with a straight edge so only needed to take a measurement and cut a straight line. I did have to go around a pipe but that too proved to be fairly easy to navigate… once Id cut the tile to the right size I laid it down and made a mark where the cuts needed to be to fit the tile around the pipe, then using scissors I made a small cut to each mark, then refit the tile to see if the cuts were deep enough to accommodate the pipe before removing the tile and making the last cut. I then re-fitted the tile.
I had left over tiles and decided to use these to make a back door mat in the same way!
What do you think of my flooring idea? Is it something you would try in your home?
THIS POST IS IMAGE HEAVY… (just to warn you incase it doesn’t load on your device…)
I’ve decided to add to my blog “A Look Around My Home” posts, essentially photo room tours, partly to share with you what my rooms look like and how I style them but also to serve as reminders to me. I like to move things around, add things and take things away so sharing these posts will be a little reminder for me in months to come, how my room looked at certain points in time.
Today I am sharing photos of my living room. I hope you will like them!
This is the full view of my window sill. I received the hanging which I use as a curtain for my birthday last year, you can find similar on Amazon .
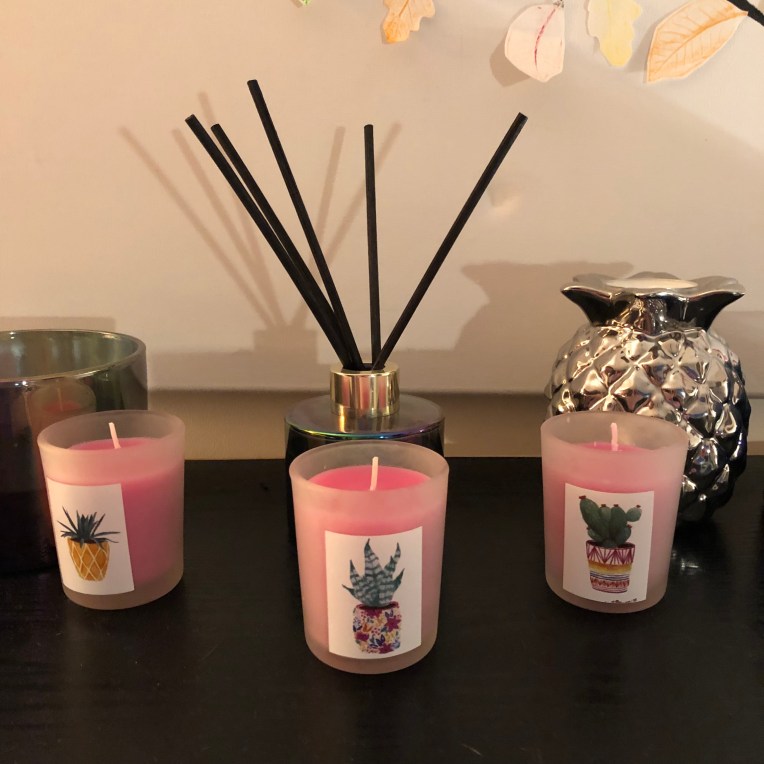
Unicorn Ring Holder and Votive Candles
I bought the Unicorn Ring Holder and the votive candles (part of a set) from Asda. Unfortunately the Unicorn Ring Holder no longer seems to be in stock but you can buy similar here. The votive candle came as part of a set of 2 along with a reed diffuser which smells absolutely divine – really fruity, from Asda.
I bought this little fellow about 20 years ago when I was on holiday in Devon from a cute gift shop.
Incense Burner and Tea Light Holder
The Incense Burner was purchased in a local shop and the Tea Light holder was a Birthday gift from a friend a few years ago.
Moroccan Tea Light Holder and Incense Burner
I bought the Moroccan Tea Light Holder in my local TK Maxx. I can’t find the item on their website but you may find similar in store!
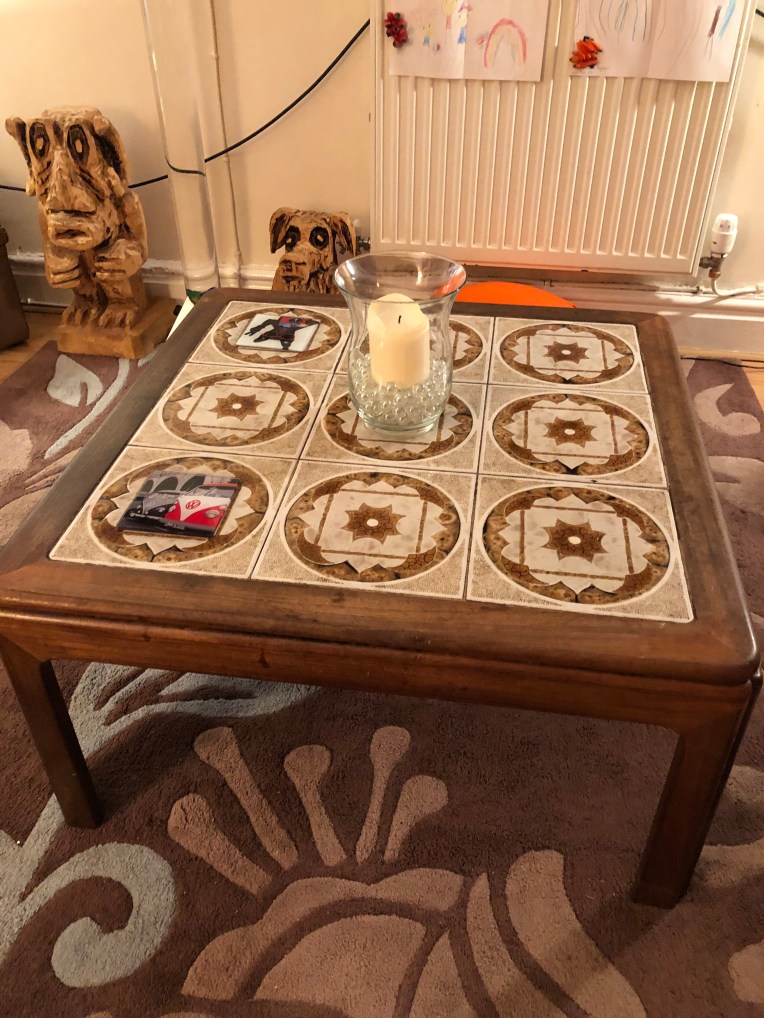
My Coffee Table and Hurricane Lamp Candle Holder
My Coffee Table was a bargain find from FaceBook Marketplace and was free to whoever collected it! I’d been searching for one like it for what seemed like an age and is now one of my favorite possessions! I can’t remember where I got the Hurricane lamp from but use it every now and again as a vase. At the moment I like using it to hold a chunky church candle.
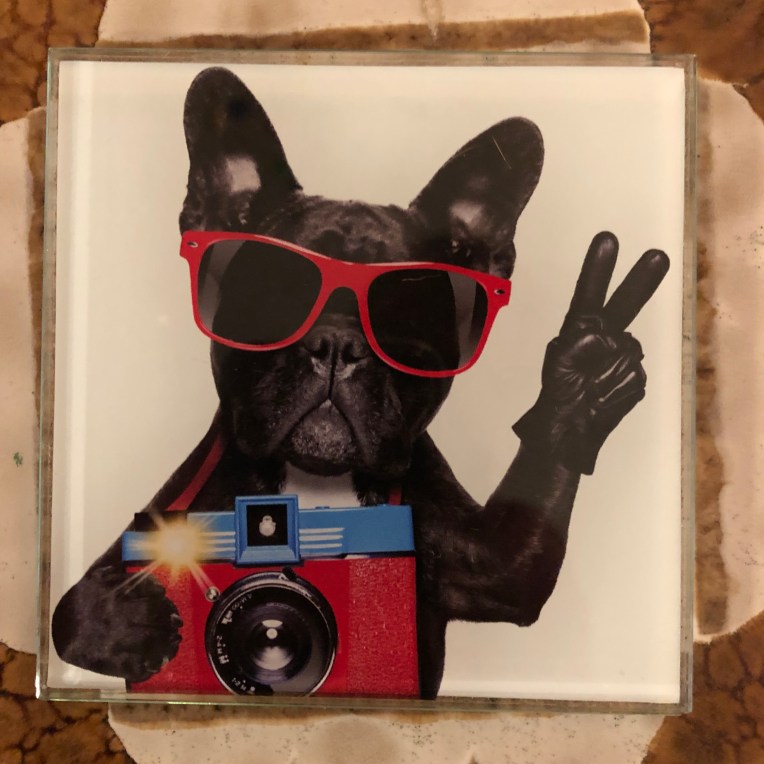
Coaster
These coasters were a Christmas present a few years ago from my brother, Richard. They never cease to make me smile!
CoasterCoasterCoasterTV and TV Stand
I bought my tv stand from Argos and was using it previously in my bedroom to store clothes in. I moved it downstairs after my neighbour gifted me her spare tv when I moved in. It currently houses a few ornaments and my classic (original) Sony Playstation and games.
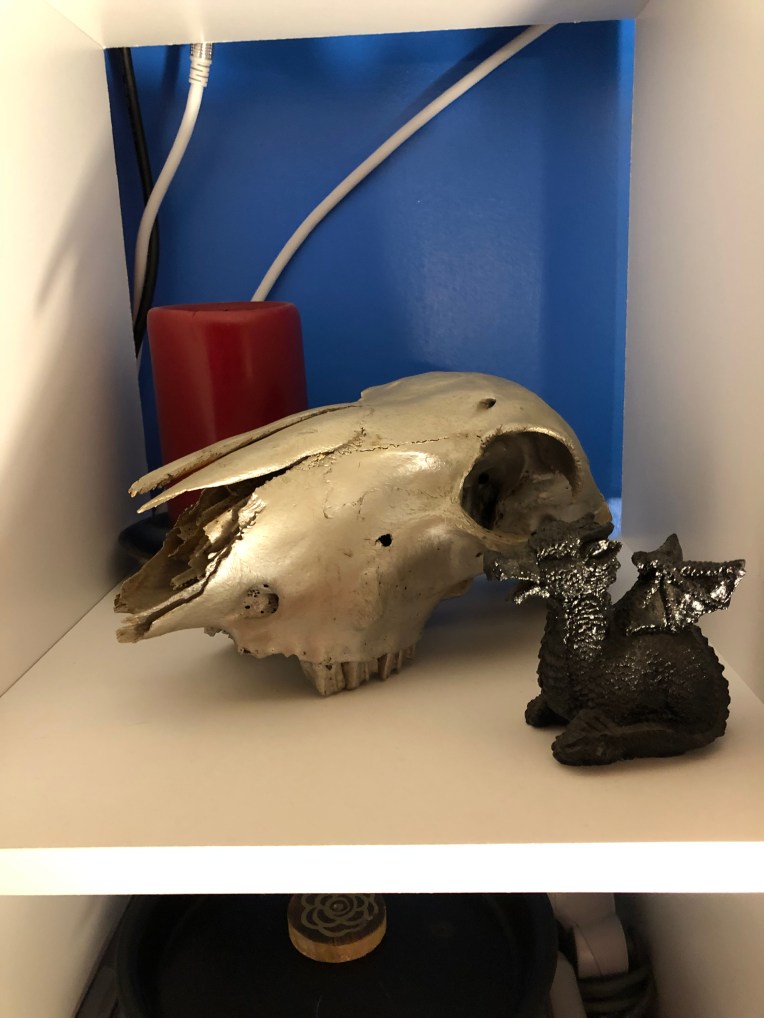
Skull, Dragon and Candle
I’ve had my sheep skull since I was in college doing an Art A Level (back in 1998) when I used him in several drawing lessons. I named him Bob and painted him silver several years ago. The Dragon is made from Welsh coal and was a present from my brother Richard.
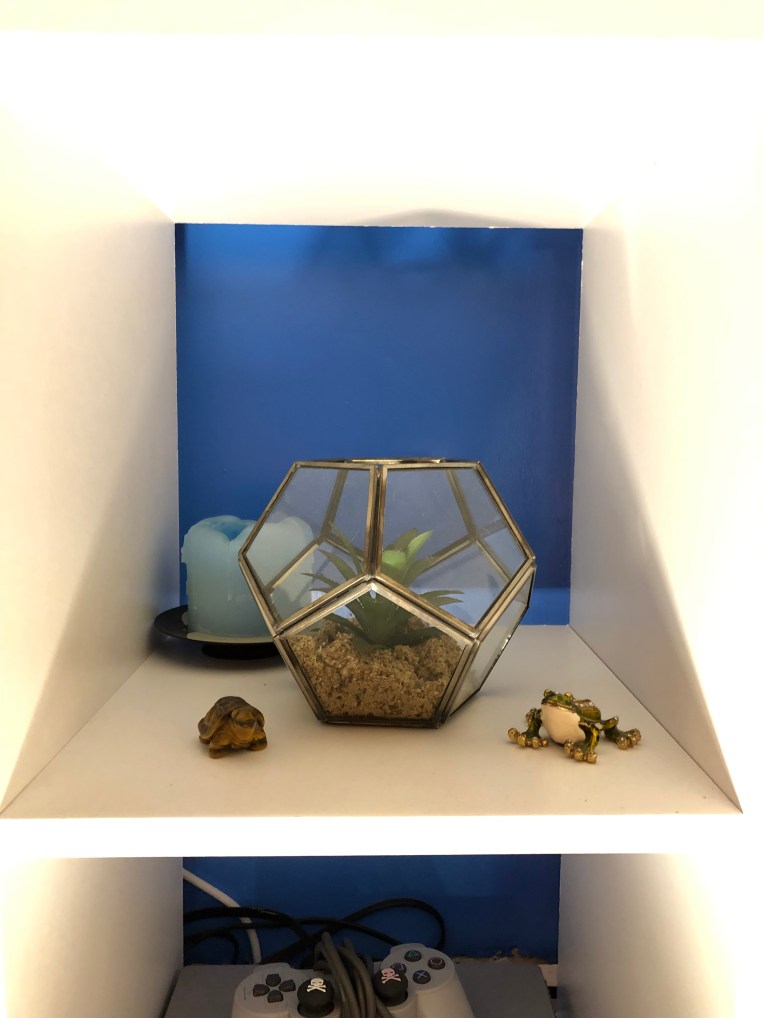
Terrarium, Frog, Tortoise and Candle
I bought the terrarium (complete with a fake succulent) in Asda, they don’t seem to stock it on their site anymore but you may be lucky to find one in store. The little frog was a present from a friend when she was on holiday, it opens up and can hold really small things. The tortoise is made from Tigers Eye, it was a gift for a birthday many years ago.
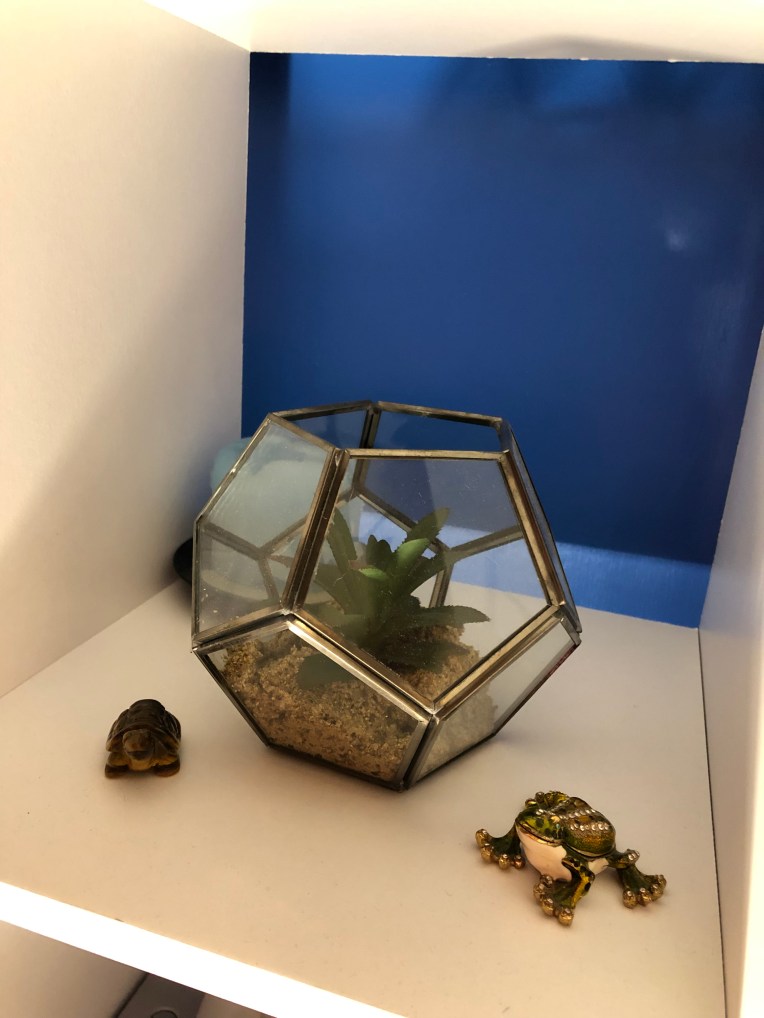
Close up of Terrarium, Frog and TortoiseCorner of My Room
I love this vignette of the corner of my room! The chest is from my friend who runs RoofRack Ragamuffinsa local shop here in Pontypool. The table lamp was upcycled by me (I added the dinosaur fringe). The dinosaur planters were a gift from my Mum and were purchased in Morrisons supermarket. The little table is a find from Facebook Marketplace. The plant and pot came from Wilkinsons.
Small Gemstone Table, My Little Pony and a Duck
Here’s a close up of the little table, I bought it from a lady on Facebook Marketplace, it holds a handful of gemstone chippings, a plastic duck and a customised My Little Pony which I’m in the middle of decorating.
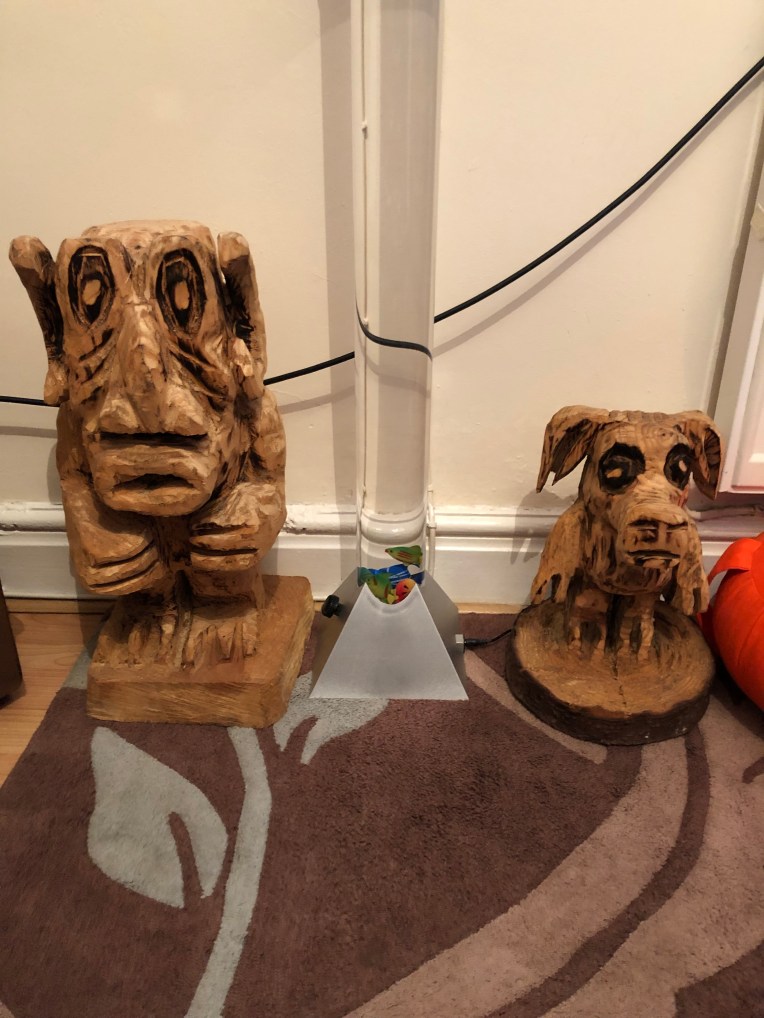
Lenny and Pigwig with my Fish Lamp
These wood carvings were made by a friend and I bought them at festivals I have been to. They are called Lenny (the big one) and Pigwig (the smaller one). The lamp is filled with water and when switched on a light shines up through the water and cycles through different colours, it produces bubbles and little plastic fish bob up and down.
Cuddle Chair and Reading Corner
This is where I like to sit and read my books. The cuddle chair is from Facebook Marketplace. The floor lamp I upcycled myself. (You can read about that here) The bookcase came from Ikea.
Book Case and Floor Lamp
The camel mobile was bought at a museum in London on a trip there years ago.
Ornament Pyramid Shelving
On the top of the bookcase is a pyramid shelving unit that I painted gold. It is filled with small nick-nacks.
Glass Jar and Skulls
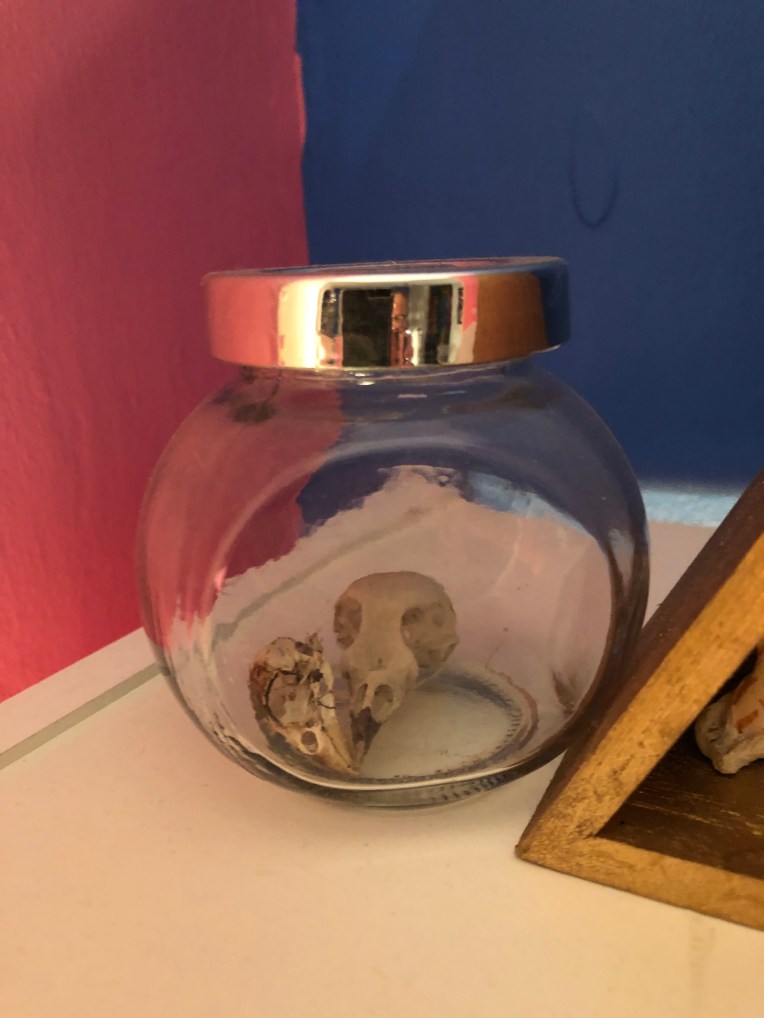
Next to the pyramid shelves are 2 jars, one contains tiny bird skulls that I found and used in art classes for drawing and painting skills.
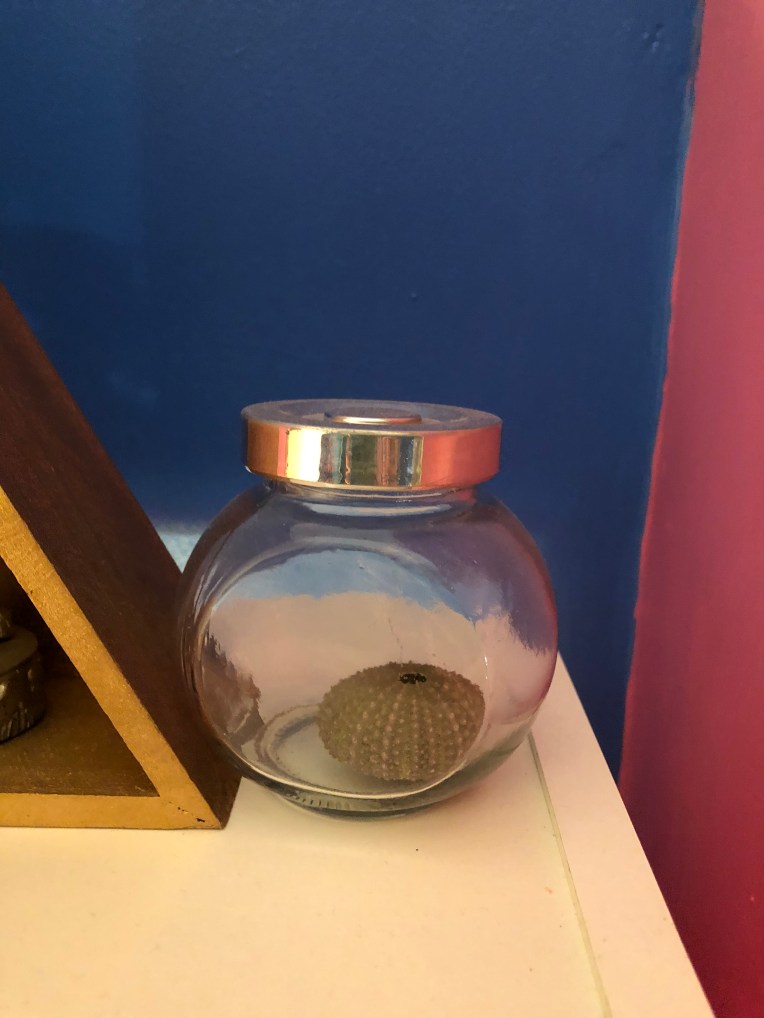
Glass Jar and Sea Anemone Skeleton
The other glass jar contains a Sea Anemone Skeleton that I found on a beach when I was on holiday a few years ago.
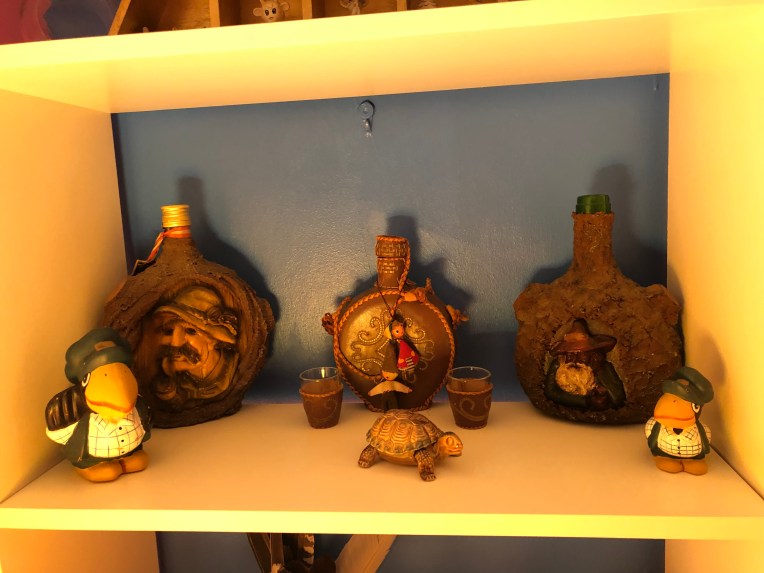
Decorated Bottles, Puffins and Tortoise
This shelf holds items that I inherited when my Grandma died. I have no idea of the origins of the decorated bottles or the puffins. The little tortoise is a holder, when you lift off the shell there is a place to keep small items.
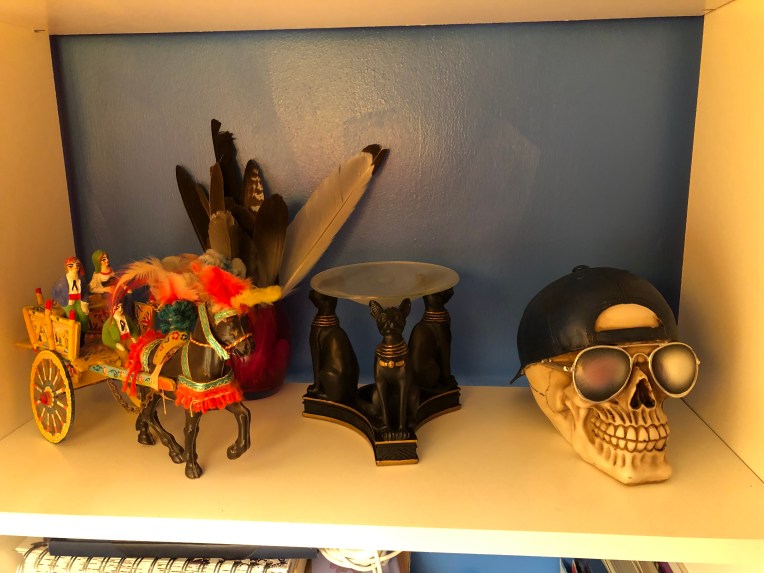
Horse and Carriage, Feathers, Oil Burner and Skull
The next shelf down is home to my Horse and Carriage that my Granddad bought back from one of his trips abroad. The oil burner was a gift from my manager when I worked in a pub and the skull was a present from my Dad a few years ago (it’s a money-box).
Another View of my Horse and Carriage, Feathers and Oil Burner
I’ve collected feathers for years and have chosen to display some of them in a pink candle holder on my shelf.
Shelf with Books and Buddah Ornament
This is where my “books to read” reside along with my filofax and other bits and bobs necessary for everyday life that I tend to lose! The Buddah ornament is a backflow incense burner that I bought a while ago from Amazon. (You can find backflow incense burners here) The bottom shelf (which you can just see…) holds books and the rest of my planners and diaries.
Artwork and More Shelving
This artwork is something I created on my Foundation Art Degree. I have placed it onto the chimney breast and placed a shelving unit below it as the chimney is not used anymore and the fire-place has been blocked up.
The small glass photocube was a present from my workmates when I left my last job.
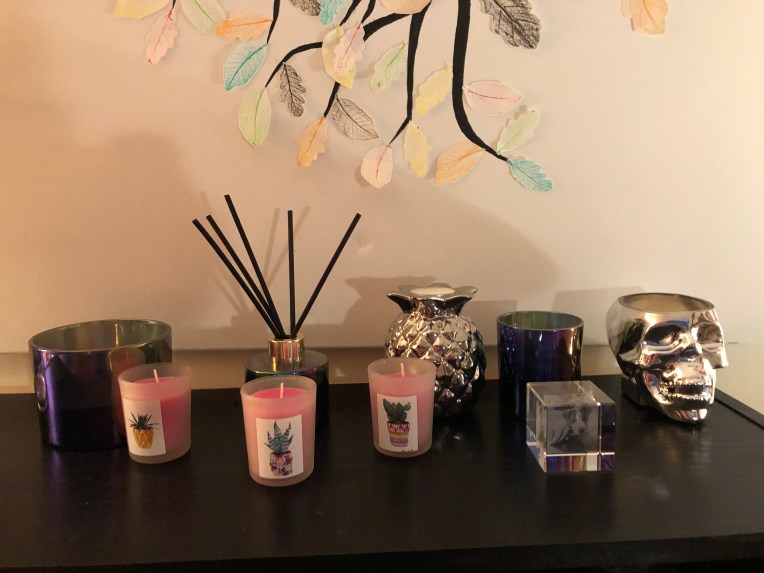
Candles and Reed DiffuserLlama Mug
My Mum bought me the Llama mug to use as a plant holder. It’s currently housing a silly dinosaur pencil!
Candles, Art and Squishies
The votive candle holders (S & R) came from Asda and stand for Suzi and Roxy! The squishie animals came from Wish.
Gemstone Bell Jar, Candles and Holders and Wooden BoxWooden Box
I can’t remember where I bought this little box from, its been in my possession for longer than I can remember. It currently keeps incense cones safe!
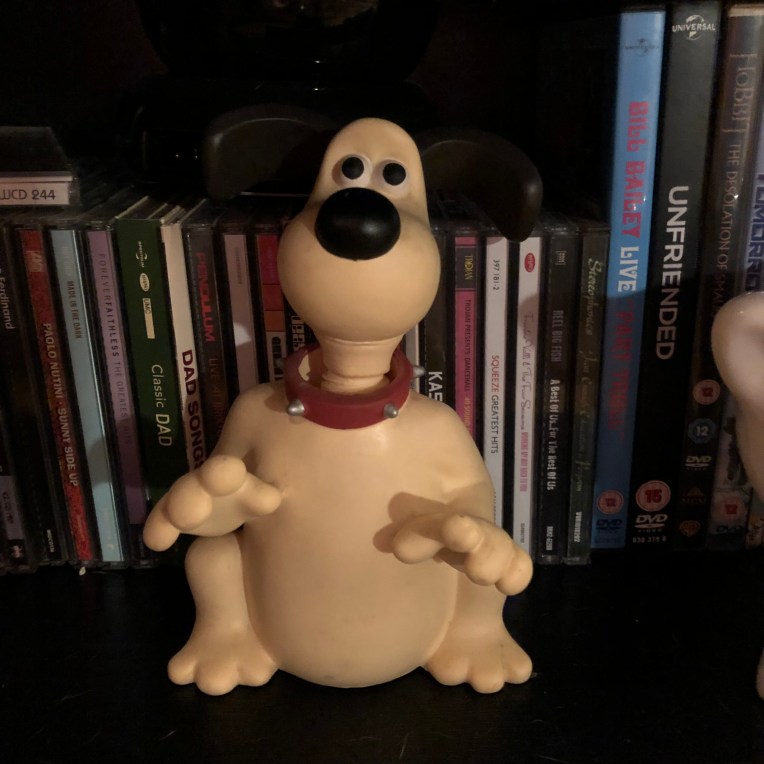
Gromit Head WobblerTroll
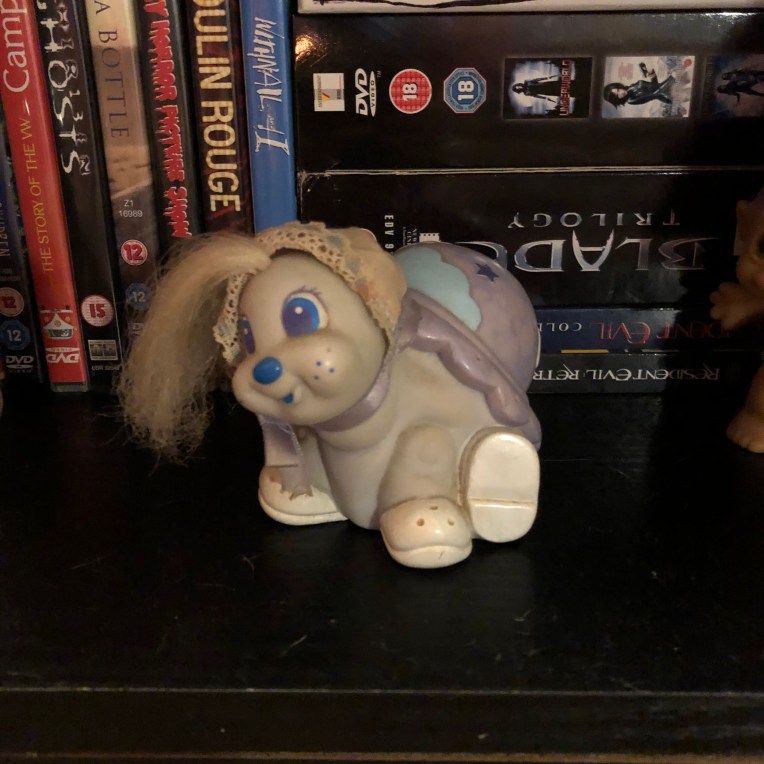
I had this troll figure (and the other one shown lower down in this post) as a Birthday present when trolls were all the rage first time around (in the late ’80s!) I’m surprised that I still have both of them given that many of my things from then have got lost over the years!
Cat Salt and Pepper Shakers
I love this pair and their cute faces! They are salt and pepper shakers that I bought for a uni art project several years ago. I have never used them for the purpose they were made for but as ornaments to have out on my shelves!
Cat Money Box
This was bought years ago from a charity shop! I use it to keep Roxy’s pocket-money safe!
TrollKeeper
Another of my ’80’s childhood toys that has survived many moves!
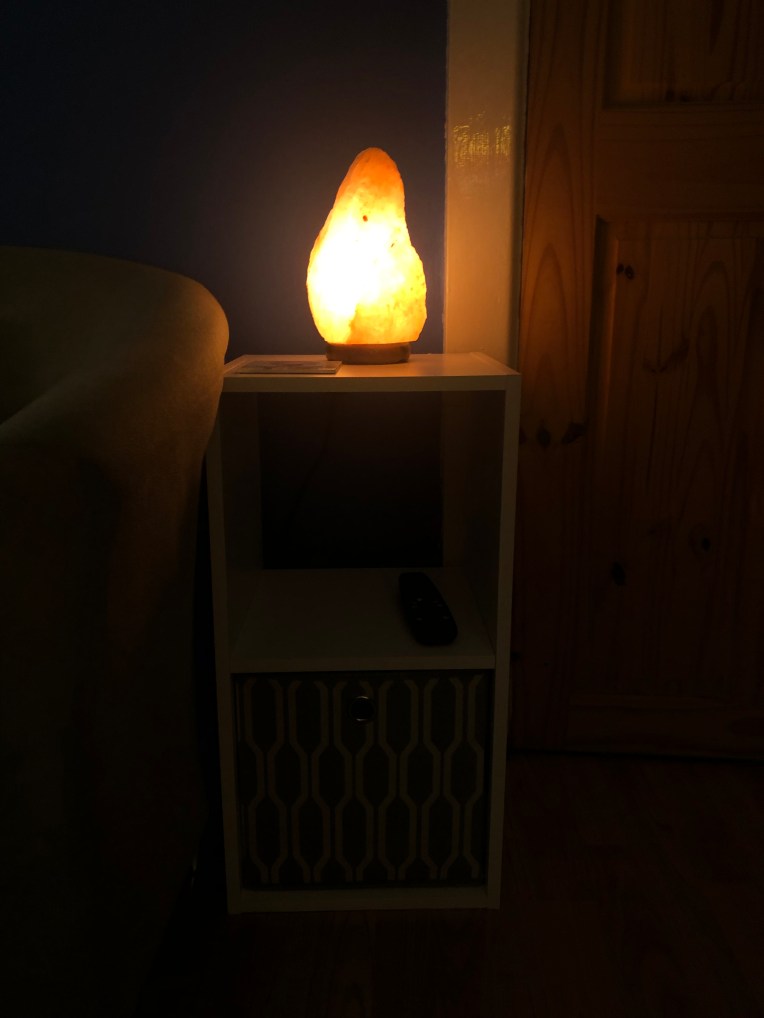
Salt Lamp and Side Unit
The salt lamp was a Birthday gift a few years ago. I bought the side unit and drawers from Argos to use as side tables as I didn’t have any. I have one for each side of my sofa and are perfect for putting a lamp on and holding a coffee cup. They are also perfect for hiding paperwork and magazines!
Coffee Table, Sofa and CushionsSofa and Cushions
The sofa is a new addition to my living room. I did have a sofabed in the space (you can see it here) but decided to move that to my spare room. I found this (and another one) exactly the same on Facebook Marketplace for £15 for the pair! The bolster cushions and covers are from Amazon (you can find similar covers here ) The rabbit cushion was a Christmas present.
Sofa and Side Unit
The anglepoise lamp on the other side of my sofa was given to me by my brother Richard when I moved in. I’ve seen similar in several different stores including Argos and Ikea.
Wall Clock
The wall clock is one of my favorite things! My friend gave me it a few years ago and I couldn’t decide where to place it. When I moved in here I knew that I would put it on the wall space behind my sofa!
Salt LampWall Picture of My Niece and Nephew
This picture of my niece and nephew was printed by Saal Digital. If you want similar then there are several places you can upload your own images from to be turned into wall pictures!
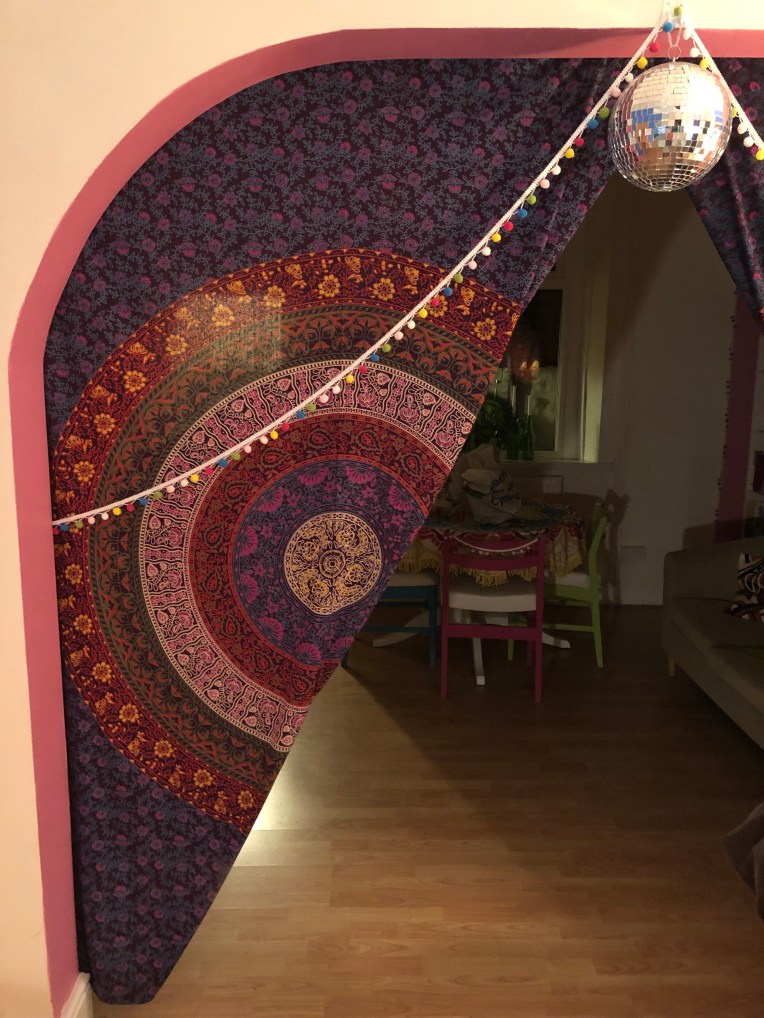
Disco Ball
I’ve had my disco ball for years and years and previously had nowhere to hang it. I’ve hung it in front of my room divider curtains.
Room Divider
One of my room divider curtains. I wrote a post about them here.
The downstairs of my home consists of a front door that opens onto a narrow hallway with a door that leads into the living area. The living area consists of 2 rooms that have been knocked into one with a bit of an archway separating the 2 spaces with a kitchen right at the back that leads onto my garden. I love the main space, it feels big and airy and light, and I love that even though it is one big space it still manages to hold the definition of 2 separate spaces so well.
Having the space set up as 2 separate rooms, the main “living room” area at the front of the house – where watching tv, sitting and relaxing, chatting with friends, reading takes place, and the “dining room” area towards the back, nearest the kitchen, made the most sense to me. I liked the idea of having areas defined by their use and making the most of the archway between what was the partition wall at one point. I started to think about creating a proper divide for the space, the idea that I could close off one part of the space if I wanted for privacy or if it got chilly in winter and I wanted the space to feel more cozy seemed really appealing. At first I thought about using my Ikea Kallax Unit to divide the space and had seen some really neat ideas using units in this way on Google, however I was worried that it could make moving between areas awkward, that I would lose floor space in one of the areas and that it would look more clumsy than cozy.
I settled on the idea of using material to divide the space, something similar to curtains, not only would it be cozy in the winter, it would be tactile and a playful addition to the pompoms Id already added to the space. I thought that more texture and print would fit together perfectly. I found just what I was looking for one evening on Amazon… I knew that I didn’t want anything to heavy as it would be a pain to hang, I also didnt want fabric that was too thick as I wanted them to be easy to clean, wash and dry. I also didn’t want anything to plain or “traditional” as it wouldn’t fit my style. What I wanted was something that was bright, patterned, fitted with the colours of the room, was a little bit hippy, easy to care for and even easier to hang and live with! I love the mandala print of these hangings, and the colours too, they seemed perfect to me. I was a bit unsure, once they had been delivered as the colours were not as bright as I had imagined or seen in the listing but decided to hang them and see what they looked like anyway…
I hung these with Command Hooks and some pegs for the short-term, though they have been hanging since July and I’ve not changed the hanging method yet, so that may not change!
I’m really happy with the space divider, using hangings to create the divide has worked out really well, they have added texture and colour as well as being a privacy screen when needed though I have not really used it to its full capacity – the curtains mainly stay open but as it gets colder and the nights get darker that may change! And despite my reservations on the colour difference when I recieved them, I’m liking them a lot, they are not overbaringly bright and garish and really go well with the rest of the room and the decor!
As promised, this is the second post about decorating my downstairs room and the extra decoration I have added.
After painting and leaving the walls to dry for a time I decided to add some fun touches and textural interest to the arches and alcoves in the form of multi-colour pompoms. I measured the alcoves and archway and searched the internet for what I had in mind…. I eventually found what I wanted from Amazon . I was able to purchase this in long lengths which was what I was looking for, each length had to be more than a meter so I could run a continuous length rather than fixing lengths together to fit into the alcoves.
I bought some Command Hooks from B&Q that are meant for hanging decorations such as Christmas Lights, to hang the trim up. Command Hooks are able to be used and removed without harming the wall underneath and, having used several of their other products in the past, decided that these would be the best thing to use. The hooks were a bit fiddly as they come in a pack – the hooks all connected to one another and the sticky part separate. You need to break off the hooks and attach the correct side of the sticky to the hook before peeling the other side from the sticky and attaching to the wall. I found it easier to break off all the hooks and then attach the sticky to them all before using.
I placed the hooks up the alcoves at equal distances but alternating the facing of the hook, so one faced towards the wall, the next at 180 degrees and facing away from the wall before weaving the trim up and through each hook.
I was really worried that upon the trim being delivered it wouldn’t be as bright as I’d wanted or, not even the correct thing at all (going by past experiences…) and worried that the overall effect would not be like I imagined. I’m really pleased with how it turned out though, and it always makes me smile. Visitors to my home have commented on how nice it looks so I’m guessing that it’s not just a hit with me!
Here’s some pictures of the room with the trim up! (please note that some of these photos are really recent ones…)
Picked Up The Keys!I moved to my new home in July, moving, though stressful, especially when things didn’t go to plan for one reason or another, was all completed in a day. I went with my friend to collect the keys, hired a van, loaded and unloaded then began unpacking. I hadn’t got much furniture but that made decorating a bit easier as there wasn’t anything to work around or move out of the way.
And…I’m in!!!!I decorated in the first few weeks that I was here and had already decided upon painting the downstairs rooms pink and blue, leaving some of the walls the original magnolia colour. I chose B&Q Colours silk paints in Electric Blue and Playful Pink after doing some research into colours and application, drying time and price. I also looked into different paint application methods – roller, brush and paint pads, choosing the latter for ease and mess reduction. I chose the Diall Paint Pad set as it came with a paint tray, two different sized paint pads and the paint pad handle and seemed to be the best value for money. I also picked up a Harris Angled Brush as I knew from previous experience that an angled brush was easier for cutting in around the edges of the walls and allowed for a neater finish.
Once I had gathered all my supplies together (and made a coffee) I began by masking off the skirting boards and applying paint to the edges of the walls before in filling with the paint pad. This was my first time using a paint pad and I found it much cleaner than using a brush or roller. The basics of using a paint pad are to attach the handle to the chosen pad, pour some paint into the tray, rest the paint pad on the paint for around 30 seconds, wipe off excess, put the pad flat against the wall and drag it up and down the wall before changing direction – going diagonal until an area is covered before repeating. I was really impressed with how easily and quickly the paint went on and had finished the first coat in under 20 mins. I did need to do a second coat of paint but that was to be expected with such a vibrant colour.
I painted the side walls of the arches with the pink paint, using masking tape on the end walls to create a panel that was as wide as the arch sides and painting them pink in order to complete the look I was going for. The pink paint seemed to apply better than the blue and only really needed touching up in a few places rather than fully applying a second coat.
Next time I will be sharing the finishing touches I added once the paint was dry and also share some pictures of the nearly completed space 🙂


![IMG_4449[1]](https://mycolourfullifeuk.com/wp-content/uploads/2018/10/img_44491.jpg?w=300&h=300)
![IMG_4443[1]](https://mycolourfullifeuk.com/wp-content/uploads/2018/10/img_44431.jpg?w=225&h=300)


