M is for Morning Skincare Routine

AtoZ2019M

You can find information about the Blogging from A to Z April Challenge here or read the rest of my A to Z posts by following this link.

Today, as part of the Blogging from A to Z April Challenge I am sharing my Morning Skincare Routine.  I wrote about my Evening Skincare Routine at the start of this challenge (as my letter E post).

Untitled design(2)

My morning skin care routine is a lot different to my evening routine and I like to focus on cleansing and preparing my skin for make-up preparation if I am going to work, or just cleansing my skin when I am at home.

I like to start my morning by applying a creamy cleanser, I find the Soap And Glory Peaches And Clean Deep Cleansing Milk to be really good for my morning routine as it doesn’t dry my skin out and leaves my skin soft.  I usually apply this product to damp skin with my hands and use my Facial Brush if I need extra exfoliation.  I remove the cleanser with my facial sponges.  I will use a flannel to remove if my skin is looking a bit dull as it can help to boost the skins circulation and help to further aid in exfoliation.

I use B Pure Micellar Oil to remove any residue left on my skin from the cleanser.  As this is oil based it really helps to moisturise my skin while removing any impurities.  I use tissue to blot my skin to remove any excess oils that are left over from the micellar oil.

Once I have finished cleansing my skin I then use this moisturiser from Tesco, it is a light moisturiser which absorbs well into my skin and contains an SPF.  This moisturiser doesn’t leave my skin greasy or any residue on the surface of my skin which is perfect for days when I want to wear makeup.

If my skin is starting to look and feel dry I follow my moisturiser with Superdrug Calm Skin Hydrating 2 in 1 Serum and Moisturiser, which I tend to apply on weekends rather than work days.  If I do use this on days when I intend to wear makeup I will apply the serum and then let it sit for around 10 mins (perfect coffee drinking time!!!) then I will blot my skin before adding a primer to my skin.  It’s not that this serum is oily or leaves much of a residue but in the past, when using different serums I have learned that my makeup doesn’t last as long if I skip the waiting and blotting step.

What is your morning skin care routine like?


L is for Life (A Day In Mine…)

AtoZ2019L

You can find information about the Blogging from A to Z April Challenge here or read the rest of my A to Z posts by following this link.

Today’s post topic starts with the letter L and today I will be sharing with you what a typical week day in my Life looks like!

7:00am.  I wake up and reach for my phone to catch up on some blog posts from my favorite bloggers, respond to any comments I may have received and check up on my Instagram and Twitter.

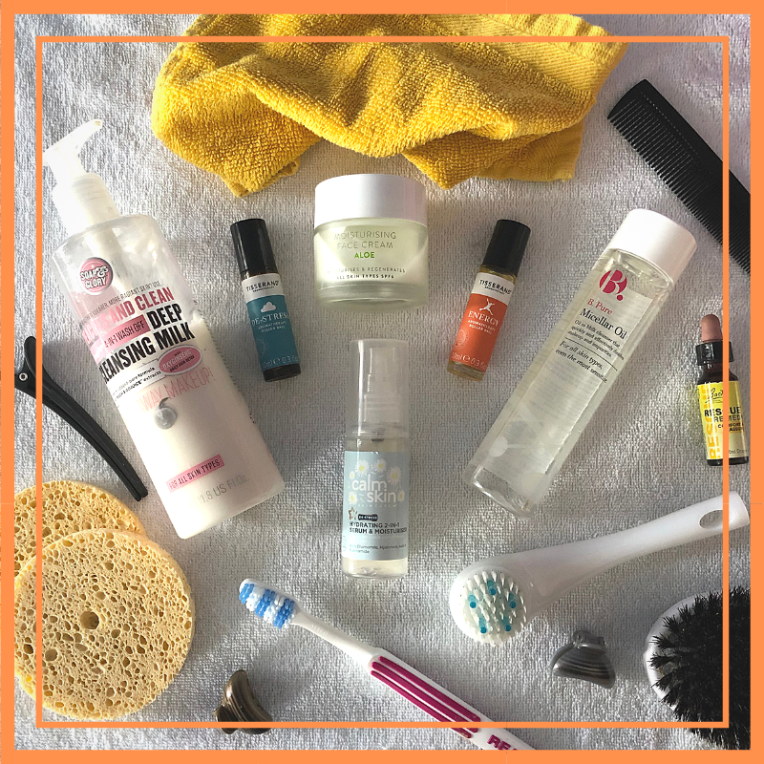
7:30am.  I get up and start getting ready for my day.  I wash my face, brush my teeth and decide what I am going to wear for the day if I haven’t picked out an outfit the night before.

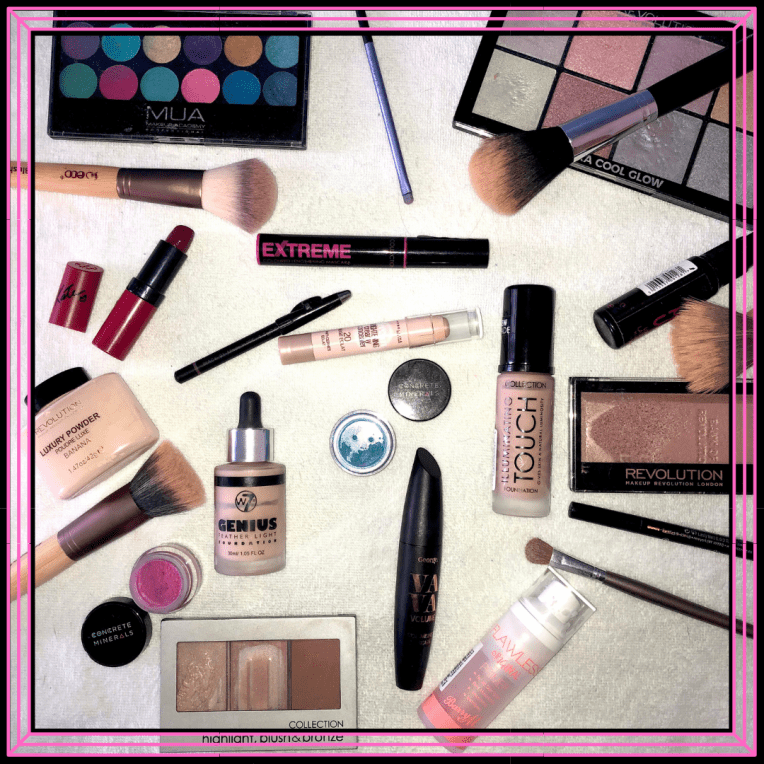
7:45am.  I put on my makeup and sort my hair out and spritz myself with my favorite perfume (incase you are wondering its Yardley English Rose!)

7:50am.  I wake Roxy up.  She’s a typical teenager trapped in a dog’s body and hates the mornings!  She would stay in bed if I’d let her.

7:55am.  We head downstairs and I let Roxy out into the garden to do her thing.  I put the kettle on and prepare my lunch for the day.  Once the kettle is boiled I make myself a coffee and fill my flask with coffee to take with me to work too.

8:10am.  Usually by this time I am ready for a hit of nicotine (I know, it’s bad and I’m slowly weaning myself off of cigarettes and onto a vape…)

8:20am.  I drink my coffee and start the hunt for my car keys and other things I will need for the day.

8:30am.  I say goodbye to Roxy and head out of the house and to my car to start my journey to work.

8:45am.  I arrive at work and park in the usual spot.  At this point I will have another nicotine fix before heading in.

8:55am.  I get to my desk and fire up my pc and log myself in to the system.

9:00am.  While my pc is loading all the software I use I check what work has been allocated to me, sort through it all and place it in piles from highest priority to lowest and in order of geographical areas.  (The work I do covers the whole of Wales and gets processed in order of area types.)

9:10am.  Once I’m logged in to my pc and all the software has loaded I check my emails and respond to any that I need to, otherwise I read and file them away into their relevant folders.

9:20am.  I start the work that has been allocated to me.

10:00am.  Breakfast!  I bring Weetabix to work with me that I eat at my desk as I work as I really struggle to eat breakfast any earlier, it makes me feel a bit sick if I eat too early.

11.00am.  Break time!  We don’t have a proper break allocated to us except for a lunch break but we are allowed to make coffee/tea whenever and at this time I tend to make myself a coffee and have a snack (usually a piece of fruit) at the same time while I work.

1:00pm.  Time for lunch.  I bring sandwiches with me and will eat them while I read something I have downloaded to my Kindle or I go out for a walk with a friend.  I find that this “time out” can really help me to re-gain my work focus and boosts my energy for the afternoon.

1:30pm.  Time to return to my desk.  I re-check my emails and respond if needed and then I re-check my work allocation to see how well I have progressed and to alter my priority if needed.

3:00pm.  Coffee time.  By this time I really need a caffeine hit and I will treat myself to a snack of some description, sometimes this will be a yoghurt, other times crisps or a piece of cake.

5:00pm.  I work through until 5pm most days, though we do have flexi time available to us which means that I can accrue time if I work earlier or later which enables me to leave work from 4pm onwards.  Usually, though, I work from 9 – 5 as I find these hours suit me the best.  I close down all of the applications that I have been using and log off from the system, gather my things and start to walk over to the car park to retrieve my car.

5:05pm.  I reach my car and start my journey home.

5:25pm.  I arrive home.  Roxy has usually only just woken up and will greet me at the door stretching and yawning.

5:30pm.  I get changed out of my work clothes and into home clothes (jeans and a hoodie or t-shirt).

5:40pm.  I let Roxy out into the garden and put the kettle on to make a coffee.

5:45pm.  I make a start on tidying the house and wash up my lunch box and flask for the next day.  I might put a clothes wash on at the same time and put the hoover around or sweep the floors if needed.

6:00pm.  I drink my coffee and sit down to catch up on the blogs I follow, respond to any comments and work on my blog schedule and any up-coming posts that I need.

7:00pm.  Dinner time!!!!  Both Roxy and I eat at the same time, she has her food while I have mine.  I usually opt or something easy for me, usually something with toast, pasta or rice.  Roxy always has the same food she always does, dry kibble!

7:30pm.  I clean up from my dinner and make another coffee.  I then head to my front room and settle in for the night with a tv programme or Netflix.

9:00pm.  Shower time.  I like to have a shower at this time as it means my hair can dry naturally, I find that it is easier to style if it air dries rather than using a hair dryer.

9:20pm.  If I’m not in my pjs by now then I normally climb into them now!

9:30pm.  I head back downstairs and will make another coffee or make myself some squash.  I will work on my blog a bit more or continue to watch my tv show.

10:20pm.  I let Roxy out into the garden so she can do her biz while I check the fridge for sandwich options for the following day.

10:30pm.  I’m head off upstairs and check out my clothes for the next day.  I like to have an idea of what I could wear before the day arrives.  This little habit stops me feeling anxious in the morning and having a panic about what to wear!

10:40pm.  I’m ready for bed.  I like to lay and read for a bit before lights off as it helps me to sleep.

11:00pm.  I check that my alarm is set for the morning and turn out the lights, snuggle up to Roxy and we both drift off to sleep.

What does your typical day-to-day life look like?

I is for Interviews

AtoZ2019I

You can find information about the Blogging from A to Z April Challenge here or read the rest of my A to Z posts by following this link.

Today is day 9 of the Blogging from A to Z April Challenge and todays topic is Interviews.  Interviews can be fairly daunting things to attend, let alone prepare for, there are so man things to consider from what to wear, how to greet the interviewer, what questions will be asked, how to prepare answers, even things like how should you sit and how to present yourself.  So, in this post I am going to share some help, advice and tips that I have learned along the way and from the many, many interviews that I have attended.  Hopefully, by applying some of these things you will feel less anxious about the interview and maybe, even, enjoy the whole process.

  1. Research the company.  These days most companies have a website and various other social media channels which make it easy to research just what the company does.  Look for information about its history, when it was set up, it’s core beliefs and values, how many employees it has and which sector it sits in.  Having this knowledge is useful as it shows that you have an interest in the company from how it started to how it got to where it is now.
  2. Research the job role.  While the job role may be generic, for example administration assistant, find out exactly what that means to that company.  Job roles can vary greatly from one company to another so it is vital that you research just what the company expects from you in the role you have applied for.  More often than not, you should be able to find out this information from the pack you received when applying for the job, however, looking online and doing a search should give you an idea of the types of activities you will be expected to carry out on a day to day basis.  Knowing this information can help you build some relevant questions to ask your interviewers.
  3. Research your interviewers.  Often, when you get invited to attend an interview, you will be given the name or names of the persons interviewing you.  It is worth spending some time looking into who they are and what their business backgrounds are, where they started, how long they have been with the company and any other useful information.  Not only will this give you an idea of who the interviewers are but it can help you to generate some interesting questions to ask them.  You should be able to find out information about your interviewers via the company website or from their LinkedIn profiles.  This step will also show that you are not only interested in the company and the job but in the people who you will be working with.
  4. Write down any questions that you may have from the first 3 points.  This is essential.  Do not rely on your memory to try to remember any questions.  have a notepad or paper beside you when researching the first 3 points and make note of questions as you go.  You can always go back and review or change the questions afterwards.
  5. Find out the dress code for the company.  Knowing the dress code for the company will help you in your choice of attire for the interview.  Have a look for the company on Facebook and see what images have been shared of their workers.  Make a note of what they are wearing, is it super formal and mostly black and white or are the clothing choices bright, modern and cool?  Once you know this you can incorporate the companies overall style into your interview outfit.  I would always suggest dressing smart but adding a hint of the company style into your outfit too, for example a skirt and jacket but instead of a shirt, maybe a bright, plain fitted t-shirt under the jacket, or a patterned dress under a formal jacket.
  6. Prepare your outfit and accessories.  Make sure that your outfit is clean and freshly laundered and pressed.  Check that your shoes are clean and any scuffs are fixed, and if necessary get them re-soled or re-heeled.  Check that your bag is clean, dust free and empty!  Write down any questions you have into a smart notebook, and make sure that you have a pen that writes.
  7. Pack your bag with interview necessities.  I like to pack my bag with only the things I may need for the interview.  My packing essentials are mints, tissues, deodorant or perfume, lip balm, hair brush, bottle of water, smart pens, notebook, spare tights.  Your list may differ slightly but it is best to only pack the things you may need, there is nothing worse than reaching into your bag for something and pulling out a load of unnecessary items, or worse, spending valuable time rummaging around to find one thing.
  8. Show up early.  I like to arrive to an interview around 15 minutes early.  This gives me time to park my car, find the interview place, go to the toilet, carry out any last-minute appearance touch-ups and gives me time to breath and calm myself.  These 15 minutes can make all the difference to your demeanour in the interview.
  9. Match your interviewers body language, posture and voice.  Watch how your interviewer sits and moves and mirror those gestures and postures.  By doing this you are encouraging feelings of trust and understanding.  Keep the same tone of voice as your interviewer, match the speed at which they talk, and talk clearly.  Try not to be too lengthy in your answers, shorter and more concise answers are easier for your interviewer to follow and remember.
  10. Ask Questions.  In all interviews I have ever attended I have been asked if I have any questions.  The worst thing to do is not have any at all which is where our research from the first 3 points comes in handy, this is your time to show that you have an understanding of the company, what is expected of you and about your interviewers.  Try to ask at least one question from each – 1 on the company, one on your role and one about your interviewer or interviewers.
  11. Maintain eye contact.  When the interviewer is speaking try to maintain eye contact, and use open body language which will help you seem focused and interested.  When you are speaking try to maintain eye contact or look from interviewer to interviewer.  This shows confidence and helps to build a bond of trust with your interviewers.
  12. Say thank you.  once the interview is over remember to thank the interviewers for their time and the opportunity to have an interview/be considered for the role.  Shake hands and, if not already mentioned, ask when it is likely that you will hear from them.

Do you have any other tips that you could add?  Have you used any of the tips I have listed and how have they helped?

H is for Hair

AtoZ2019H

You can find information about the Blogging from A to Z April Challenge here or read the rest of my A to Z posts by following this link.

I always dye my hair bright colours, I’ve been pink, blue, green, orange, turquoise, peach, red, magenta, purple, lilac and all shades and tones in between.  I’ve been dying my hair for around 20 years, and over that time I have had lots of questions about caring for coloured hair so, as todays Blogging From A to Z letter is H, I thought I would share a bit about my hair, dying it and caring for it afterwards.

***I am in no way a “hair expert” and these hints/tips are what I have learned through research and my own trial and error.***

***Please always read any dye or bleach instructions fully before attempting any home colouring and ALWAYS perform a skin and hair test at least 24hrs prior to using.***

When I decide to dye my hair I like to start with a base tone as light as possible so I always start with hair bleach.  I use Jerome Russell Bblonde Powder Bleach and 40 Vol 12% Cream Peroxide from the same range to lighten my hair.  I add the peroxide to the powder and stir through using a plastic tint brush in a glass bowl.  Before applying to my hair I add a generous amount of cheap hair conditioner to the prepared bleach.  I find that adding this in stops my hair from getting overly dry during the lightning process.  As my hair is naturally dirty blonde it doesn’t take long for the bleach to start working its magic and I find that after around 15 minutes it is ready to be rinsed off.  I would recommend checking on your hair every few minutes to see how well it is processing and never leave it on for more than 20 minutes.  Always follow the manufacturers instructions.

IMG_3464 Once the bleach has lightened my hair to the desired level I then rinse off the bleach with cool water.  I towel it dry and then apply Bleach London white Toner which helps to even out the tone of my hair to an almost platinum shade.  Once this has been left on for the time stated in the instructions I rinse it off, again using cool water and then towel dry.

Now comes the fun part, putting the colour onto your hair!

IMG_3468

I tend to use Bleach London Super Cool Colour dyes as it comes in an array of colours and take well to my hair and last quite a long time too.  They are semi-permanent colours and will fade over time but I have found these to fade evenly all over and the colour still remains pretty.  I have also used a few Pick & Mix Colours from Superdrug which also fade down really nicely.

The easiest thing I have found is to squeeze an amount of dye into a glass dish and apply to the hair-line with a dye brush before adding more dye directly to the hair using gloved hands and working through.  Once your hair is saturated with dye then get a length of cling film and wrap it over your head and hair before covering with a towel.  Leave it to sit for as long as is recommended in the manufacturers instructions before rinsing off with cool water.

IMG_3469

Once you have rinsed and towel dried, apply a deep conditioning treatment such as Bleach London Reincarnation Mask or a hair oil like Superdrug Coconut Oil with Argan and leave to sit on the hair for as long as you want.  Personally, I aim to deep treat my hair for around an hour.  This step will ensure that your hair is soft and manageable and will retain the colour for longer.

Tips to make your colour last.

  • To make the colour last longer I recommend always buying a second bottle of colour and each wash, add a bit to both the shampoo and conditioner as you use it.
  • Deep condition your hair once a week, again, adding a bit of dye to the conditioner, this will prevent your hair looking dry and becoming unmanageable.
  • Dry shampoo is your friend, where possible, use dry shampoo instead of washing.  I try to wash my hair twice a week when it has been coloured.
  • Use shampoo and conditioner formulated for coloured hair or use baby shampoo.
  • Try to avoid styling products.  I have found that hair spray especially, seems to suck colour from my hair.

When you want to change your hair colour it is important to fade your hair as much as possible before bleaching or re-dying.  In order to fade the colour you will want to wash your hair as much as possible, anti dandruff shampoo is really good at helping to fade dye!  By fading the colour as much as you can it will mean that, should you use bleach, you shouldn’t need to leave it on your hair for long.

If you want to change your colour without bleaching then think about what colour your hair is now and what colour you may want to end up with.  Transitioning from similar colours can be fairly easy and I have gone from pink to purple to turquoise without any need for bleach.

Here’s a few pictures of my hair over time!

This slideshow requires JavaScript.


G is for Gemstones (and crystals…)

AtoZ2019G

You can find information about the Blogging from A to Z April Challenge here or read the rest of my A to Z posts by following this link.

Today’s Blogging From A to Z letter is G and today I am sharing about my love of gemstones.

IMG_3433

I’ve always loved gemstones and from an early age I have been a collector of them, I was fascinated with how they looked and felt to hold.  My first gemstone was a piece of moss agate which, when you peered at it you could see formations that looked like trees and bushes.  My imagination used to run riot and I’d spend hours dreaming up scenarios involving being under water and of ethereal landscapes trapped in time, making up stories about the people and animals that could have lived in such places.

Over time, and as I grew up, my collection grew to include, not just tumbled stones, but several pieces of jewellery that incorporate gemstones (necklaces, rings, bracelets, earrings) and I started to read about the healing powers that the crystals held, how to care for them and cleansing and charging of them.

I find it really interesting how such a small stone can hold so much power and can help in so many different ways.  I carry around a piece of moonstone, hematite, amethyst and rose quartz with me daily, and wear a bracelet with turquoise beads on it, a moonstone ring and a necklace that houses a ball of rose quartz.

Moonstone is a really calming stone, and even when I can’t see it, knowing that I have it with me seems to help me to feel less anxious.  I carry a moonstone tumble stone with me in a small pouch and also wear a ring set with moonstone daily.

Hematite is a grounding stone which is also calming, it can aid in concentration which is really helpful for me as I find that at times my concentration is really low because of the medication I take.  I carry this stone in a pouch with me daily.

Amethyst is another calming stone which can help with headaches too.  It can also help to reduce stress and I like to hold this stone and sit quietly for a few minutes when I can feel the stress levels in my body starting to rise.  This is another tumble stone that I carry with me daily.

Rose quartz is one of my favorite stones.  It is the stone of love and can help to reduce any ill feelings you may have.  I wear this stone daily in a necklace and carry it in a pouch with me daily.

Turquoise is known for its healing properties but is also the stone of protection and communication.  I wear a turquoise beaded bracelet daily and it seems to give me more confidence when speaking and the ability to explain myself in a better way.

Below I have included some images of different gemstones that I found on Google.

If you are interested in gemstones and crystals let me know in the comments!

F is for Fountain Pens

AtoZ2019F

You can find information about the Blogging from A to Z April Challenge here or read the rest of my A to Z posts by following this link.

Today marks the 6th blog post as part of the Blogging From A to Z April Challenge and the corresponding letter is the letter F.  The topic for this post is Fountain Pens!

I can remember learning to write in school with a HB pencil and the promise of writing with a “real pen” once our handwriting was good enough.  While most kids in my class just dreamed of becoming one of the big kids and writing with any old pen, I always had ideas of owning my own fountain pen and writing with that.

The idea of having my own fountain pen came from my Dad and Grandad who both had beautiful handwriting and wrote with fountain pens, my Dad still, to this day writes with his trusty Parker pen.  Somewhere along the way, I came to believe that the key to beautiful handwriting was a fountain pen.

I can remember the first fountain pen I owned, my Dad presented it to me on my first day of Secondary School when I was 11.  It was a brushed chrome Parker pen, my Dad had bought a refillable cartridge for it and bottles of Quink Ink in Blue and Black and I felt so grown up.  The pen was a dream to write with and made my handwriting look so neat, I’m sure the belief that I’d had when I was younger was true.

img_1318

I don’t have that pen anymore but I do have several others in my collection which I love.  The latest addition is a Lamy Safari in Neon Lime which I use on a day-to-day basis for making notes in my planner and when I am at work.  I use the Lamy T10 (Special Edition Petrol Blue) cartridges in it.

My other go to pen is my Parker IM series in Dark Espresso.  This pen reminds me of the one my Dad gave me both in the way it writes and how it feels in my hand, though the look is totally different.  I use Parker Quink cartridges in this, usually the blue/black ink but I have been known to switch to black on occasion.

I know that fountain pens are not the most practical to use every day, they can be leaky, feather, shadow and a whole host of other problems, and I know, for certain tasks, there are other pens that are more worthy of the job, but for me there will always be something very special about writing with a fountain pen.

Do you use a fountain pen?

Just a reminder that there will be no Blogging From A to Z post tomorrow, Sundays are the only day the challenge does not run!  I will be back with the next post on Monday!


B is for Beauty

Today is the second post in the Blogging from A to Z April Challenge.  If you would like to read more of this series of posts you can find them here.

AtoZ2019B

You can find information about the Blogging from A to Z April Challenge here or read the rest of my A to Z posts by following this link.

Untitled design(13)

Beauty, so it has been said, comes from within but, sometimes, we all need a little help with the outside too in the form of makeup.  Today, as part of the Blogging from A to Z April Challenge, and today being the letter B I’m going to share with you the beauty items that I use.

Primer

Untitled design

I use the Flawless Original Primer by Barry M as my base for my make up application.  I really like this primer as it’s not sticky like some primers can be, it is really easy to apply and you only need a tiny amount.  When I use this my foundation applies really nicely and seems to last a really long time compared to when I apply foundation without a primer.

Foundation

Untitled design(1)

I currently flit between 2 different foundations W7 Genius Feather Light Foundation in Buff or Collection Illuminating Touch Foundation in Warm Vanilla, depending on the type of coverage I need.  The W7 foundation has a fairly light coverage, the consistency is really runny but it blends well and dries to a powder like finish which I love as I can save a little bit of time by then skipping powder.  I love that this has a dropper applicator that gives a precision application directly where you need it, I then blend with a beauty blender for the best finish.  The Collection foundation is a slightly darker tone but matches my skin tone perfectly.  This has a pump top and it has a nice, thick consistency.  I have found that you need to work quickly with this product as it seems to set quite fast though I do like to use a powder once I have applied the foundation just to make sure it is fully set.  I like that this product is a fuller coverage and is brilliant for when my skin is not looking its best.

Concealer

Untitled design(2)

I use Maybelline Dream Brightening Creamy Concealer in Light I love that this concealer is a pencil design and twists up from the base to access more product.  I use this before foundation under my eyes to illuminate the area and after foundation to conceal any spots or blemishes that may not have been covered by foundation alone.

Powder

Untitled design(3)

I use Revolution Luxury Banana Baking Powder to set my foundation.  I really like that this powder is really fine and helps to brighten my skin tone.  Under the twist off lid is a salt and pepper type of shaker lid and I sprinkle this onto a buffing brush before applying over my foundation.

Contour

Untitled design(4)

I use the Collection Highlight, Blush and Bronze Trio for contouring, though as you can see, I have hit pan on the blush so I only really use this pallet for the highlight and the contour now.  I really like that this product is easy to apply and blends really well.  I use a contour brush to apply the powder and an angled blush brush to apply the highlighter.  The only thing I dislike is that the highlighter seems to be a bit hard in places so it looks weird in the pan but it doesn’t seem to affect the application.

Blush

Untitled design(5)

Technically this is a highlighter and not a blush but the pink tone of this Revolution Rose Gold Ingot Highlighter lends itself well to being a dual purpose product – a highlighter and blush all in one!  This product is not too sparkly or overly shiny but adds a warmth and a golden tone to cheekbones which looks really pretty.  I love using this product on bare skin and with foundation, either use makes me look really healthy!  And this is the third purchase of this product I have made!

Highlighter

Untitled design(6)

This highlighter pallet, Revolution Ultra Cool Glow, is my favorite to reach for when I am going out for the evening.  I love the variety of different coloured highlighters and like to match them to my eyeshadow colour or the colour of the outfit I’m wearing.  A little goes a long way with this product as they are super pigmented and bright.  And, I have a confession to make, when I bought this product I didn’t realise it was a highlighter pallet, I was looking for an eyeshadow pallet that I could take with me to a festival and grabbed this quickly in a rush… but, I do love a product that has a dual purpose and these highlighter colours have made really nice eyeshadows too!

Eyeshadow

Untitled design(7)                   Untitled design(8)

These eyeshadow products are my go to shadows.  The first is the Make Up Academy pallet in Poptastic (which seems to be discontinued though the Silent Disco Pallet seems to be very similar….), the second are loose powders from the Sugar Skull Collection by Concrete Minerals (I have the full set of these and also the Zombie Girl Collection)  These shadows seem super bright in the pan and pots but all have a really buildable colour, blend really easily and you can create so many different looks with each collection.  I don’t always wear these together, sometimes I use a grey or silver shade as a base and add a pop of colour along the socket line or combine 2 or 3 different shades to create a super colourful smokey eye.

Eyeliner and Mascara

Untitled design(9)

I like to use different mascara and eyeliner depending on the look I am going for.  Day-to-day I tend to use George Va Va Volume Mascara – Black as it doesn’t tend to flake or smudge and just enhances my lashes a bit.  It is also really easy to remove which is a plus on week nights!  I like using Model Co Eye Define Pencil – Black for a softer eye look and this pencil is perfect.  It is soft and doesn’t drag the skin, is really easy to smudge out if I want a softer, more subtle look or can be left as it is for a more defined look.  I like to use Collection Extreme Coloured Lengthening Mascara – Black if I am going to be going out after work or on the weekend if I am out as it really defines my eyes and makes me look more awake.  And it is true to its word – it really does add length to the lashes with just one swipe!  And for a more defined, cat eye look I really love Essence Superfine Eyeliner Pen – Black as it is a felt pen design and is has a really accurate, precision application which is just what you want for a sharp eyeliner look.

Fix

Untitled design(10)

I really loved this product but it was discontinued a while ago.  I was really lucky to snag myself a few of these from Amazon not too long ago but I’m down to this last bottle.  Collection now do another spray for setting make up with called Primed and Ready Make Up Fixing Spray which I am considering getting once I run out of this.  This spray is fab for fixing make up in place once you have finished applying it, the handy spray pump ensures that the product mists finely over the skin and covers well.

Lipstick

Untitled design(12)

Rimmel London Kate Moss Lasting Finish shade 107 is one of my favorite shades of lipstick.  It is not too dark or light, can pull any make up look together and the shade is good for day or night.  I really like the formula, it is creamy and feels moisturising, it lasts a fair few hours and doesn’t seem to bleed or feather.  I really like all the Kate Moss lipsticks and own a few darker shades that are perfect for evenings.

What are your go to beauty/make up products?

Blogging from A to Z

AtoZ2019tenthAnn

This month I am going to be taking part in  the Blogging from A to Z Challenge where each day through April, excluding Sundays, I will be working my way through the alphabet, one day at a time.  To see more about this challenge please see the link (here)

You can expect to see a post from me each day with a topic relating to that days letter, these will be posted each day except Sunday’s.  I will also be posting my usual blog posts (Top 10 Thursday, and posts on a Tuesday and Friday too).

Here’s a calendar so you can see which letters will be on which days…

Blog Calendar April A-Z Challenge