THIS POST IS IMAGE HEAVY… (just to warn you incase it doesn’t load on your device…)
I’ve decided to add to my blog “A Look Around My Home” posts, essentially photo room tours, partly to share with you what my rooms look like and how I style them but also to serve as reminders to me. I like to move things around, add things and take things away so sharing these posts will be a little reminder for me in months to come, how my room looked at certain points in time.
Today I am sharing photos of my living room. I hope you will like them!
This is the full view of my window sill. I received the hanging which I use as a curtain for my birthday last year, you can find similar on Amazon .
Unicorn Ring Holder and Votive Candles
I bought the Unicorn Ring Holder and the votive candles (part of a set) from Asda. Unfortunately the Unicorn Ring Holder no longer seems to be in stock but you can buy similar here. The votive candle came as part of a set of 2 along with a reed diffuser which smells absolutely divine – really fruity, from Asda.
I bought this little fellow about 20 years ago when I was on holiday in Devon from a cute gift shop.
Incense Burner and Tea Light Holder
The Incense Burner was purchased in a local shop and the Tea Light holder was a Birthday gift from a friend a few years ago.
Moroccan Tea Light Holder and Incense Burner
I bought the Moroccan Tea Light Holder in my local TK Maxx. I can’t find the item on their website but you may find similar in store!
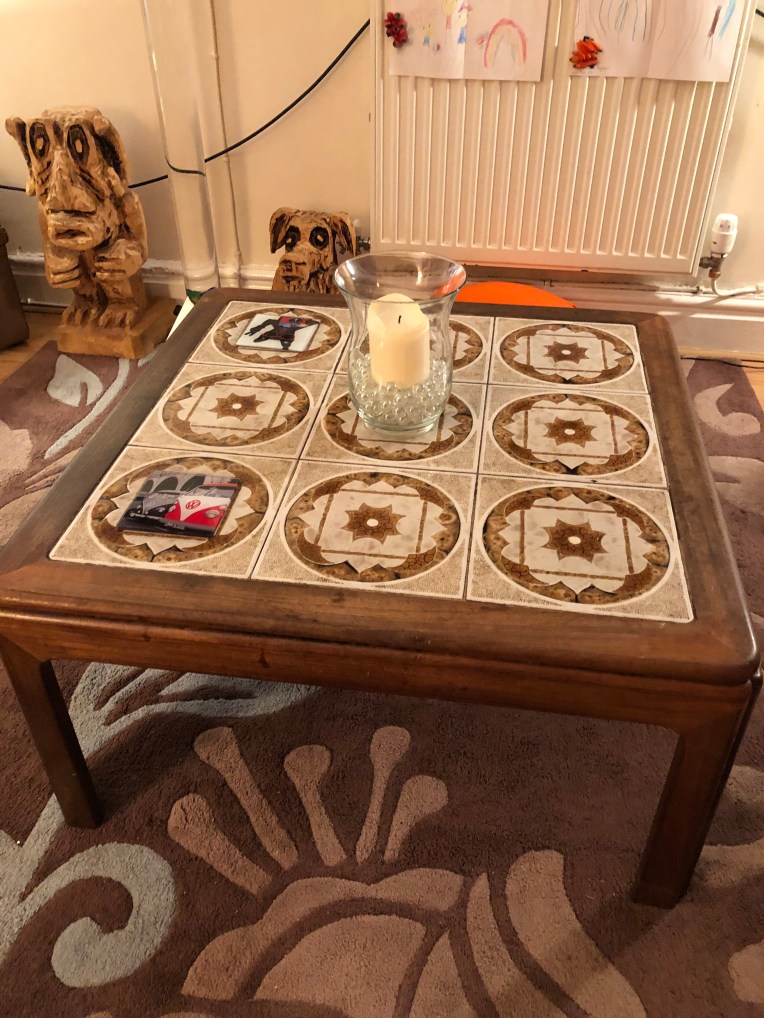
My Coffee Table and Hurricane Lamp Candle Holder
My Coffee Table was a bargain find from FaceBook Marketplace and was free to whoever collected it! I’d been searching for one like it for what seemed like an age and is now one of my favorite possessions! I can’t remember where I got the Hurricane lamp from but use it every now and again as a vase. At the moment I like using it to hold a chunky church candle.
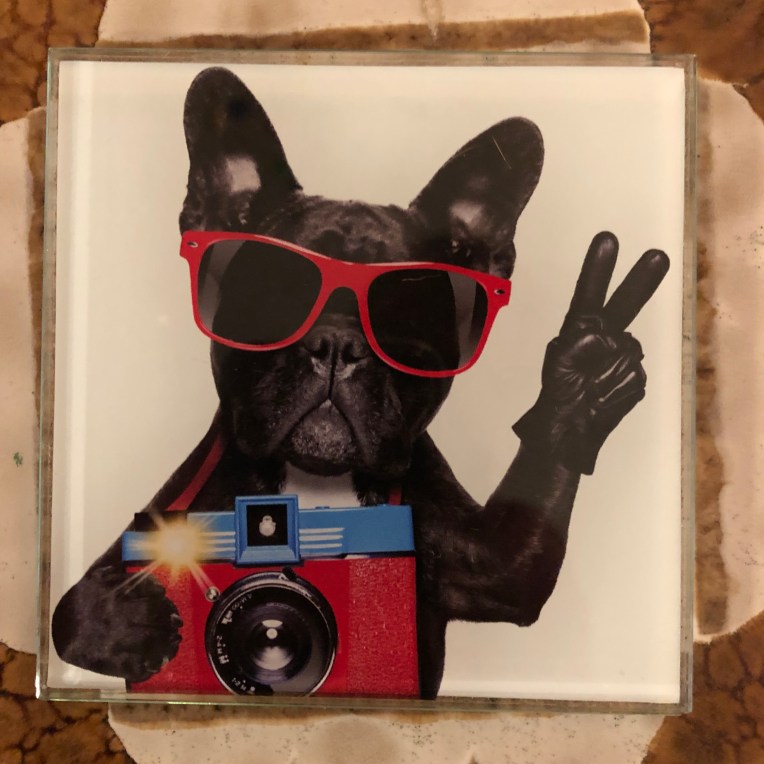
Coaster
These coasters were a Christmas present a few years ago from my brother, Richard. They never cease to make me smile!
CoasterCoasterCoasterTV and TV Stand
I bought my tv stand from Argos and was using it previously in my bedroom to store clothes in. I moved it downstairs after my neighbour gifted me her spare tv when I moved in. It currently houses a few ornaments and my classic (original) Sony Playstation and games.
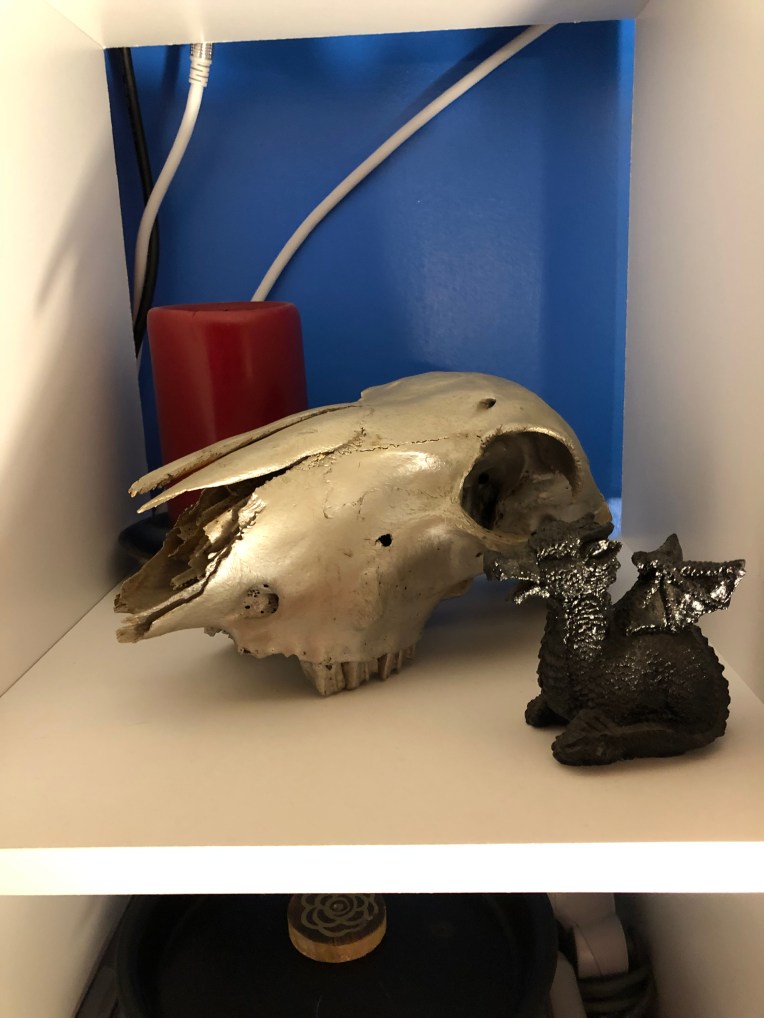
Skull, Dragon and Candle
I’ve had my sheep skull since I was in college doing an Art A Level (back in 1998) when I used him in several drawing lessons. I named him Bob and painted him silver several years ago. The Dragon is made from Welsh coal and was a present from my brother Richard.
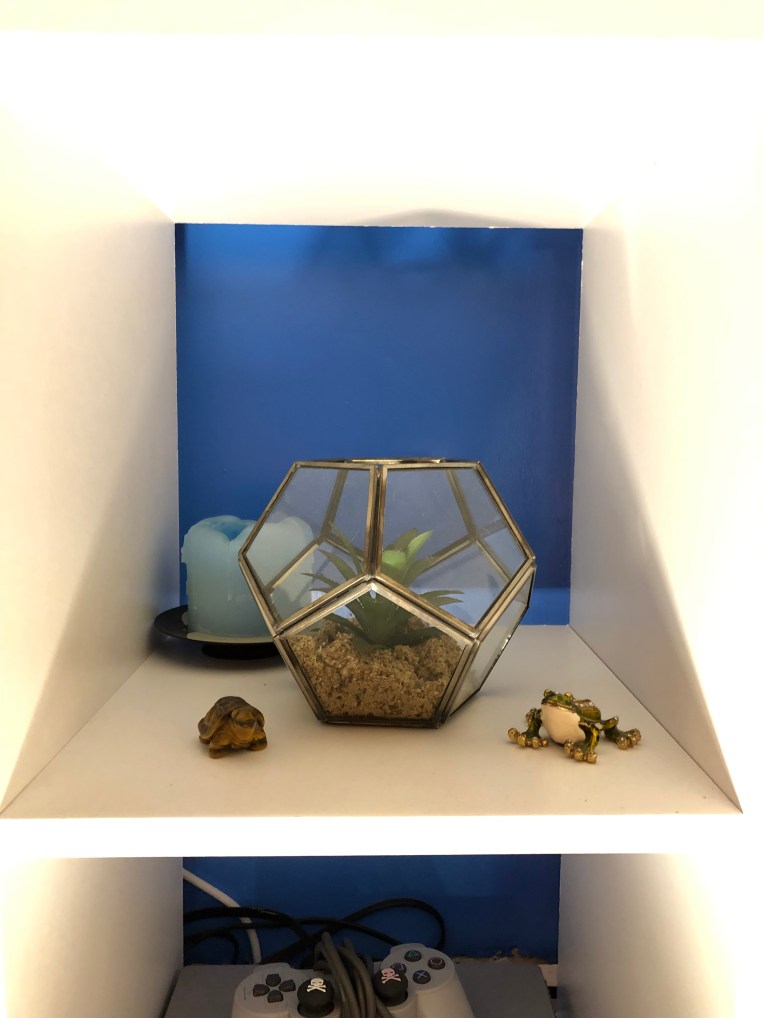
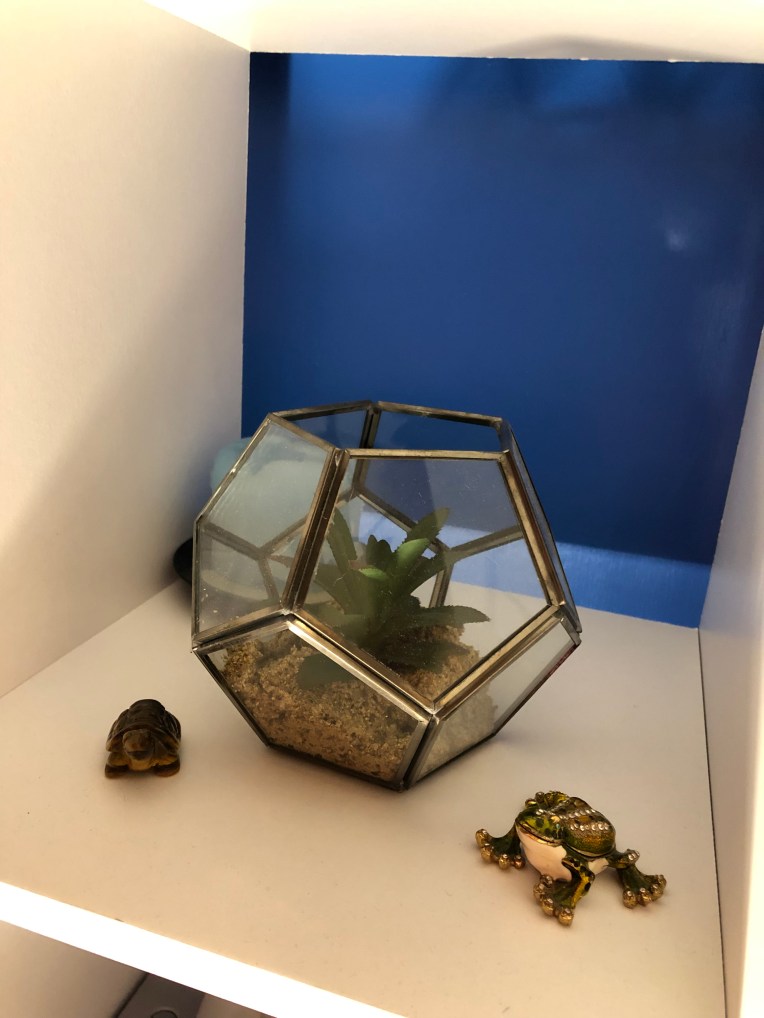
Terrarium, Frog, Tortoise and Candle
I bought the terrarium (complete with a fake succulent) in Asda, they don’t seem to stock it on their site anymore but you may be lucky to find one in store. The little frog was a present from a friend when she was on holiday, it opens up and can hold really small things. The tortoise is made from Tigers Eye, it was a gift for a birthday many years ago.
Close up of Terrarium, Frog and TortoiseCorner of My Room
I love this vignette of the corner of my room! The chest is from my friend who runs RoofRack Ragamuffinsa local shop here in Pontypool. The table lamp was upcycled by me (I added the dinosaur fringe). The dinosaur planters were a gift from my Mum and were purchased in Morrisons supermarket. The little table is a find from Facebook Marketplace. The plant and pot came from Wilkinsons.
Small Gemstone Table, My Little Pony and a Duck
Here’s a close up of the little table, I bought it from a lady on Facebook Marketplace, it holds a handful of gemstone chippings, a plastic duck and a customised My Little Pony which I’m in the middle of decorating.
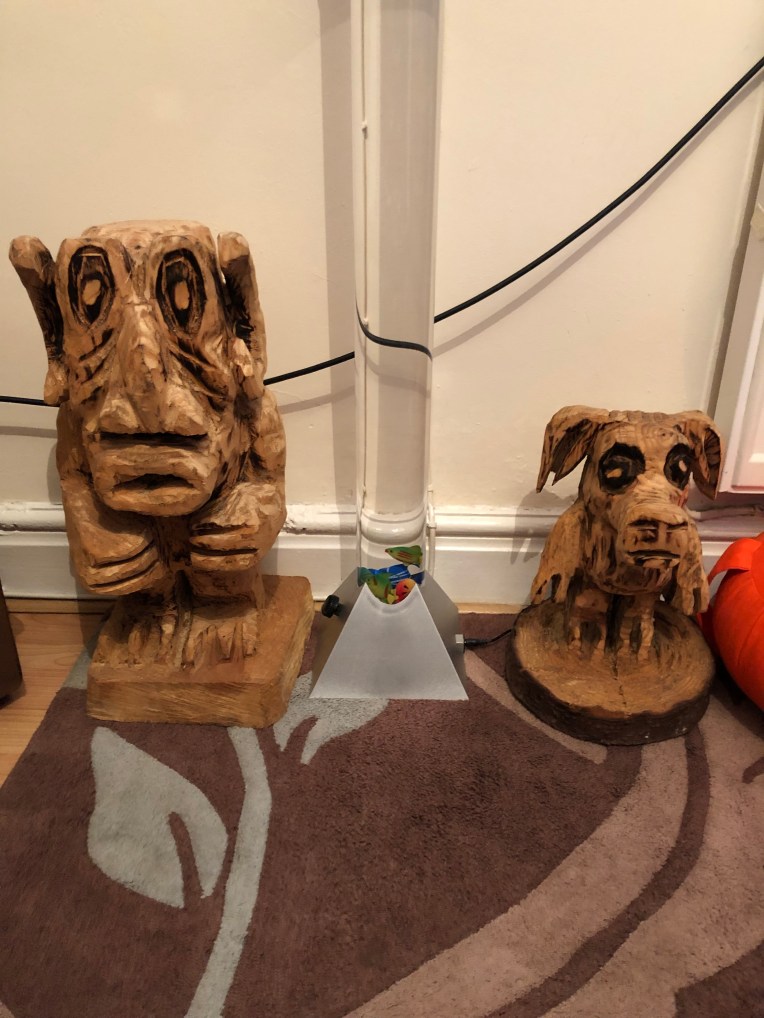
Lenny and Pigwig with my Fish Lamp
These wood carvings were made by a friend and I bought them at festivals I have been to. They are called Lenny (the big one) and Pigwig (the smaller one). The lamp is filled with water and when switched on a light shines up through the water and cycles through different colours, it produces bubbles and little plastic fish bob up and down.
Cuddle Chair and Reading Corner
This is where I like to sit and read my books. The cuddle chair is from Facebook Marketplace. The floor lamp I upcycled myself. (You can read about that here) The bookcase came from Ikea.
Book Case and Floor Lamp
The camel mobile was bought at a museum in London on a trip there years ago.
Ornament Pyramid Shelving
On the top of the bookcase is a pyramid shelving unit that I painted gold. It is filled with small nick-nacks.
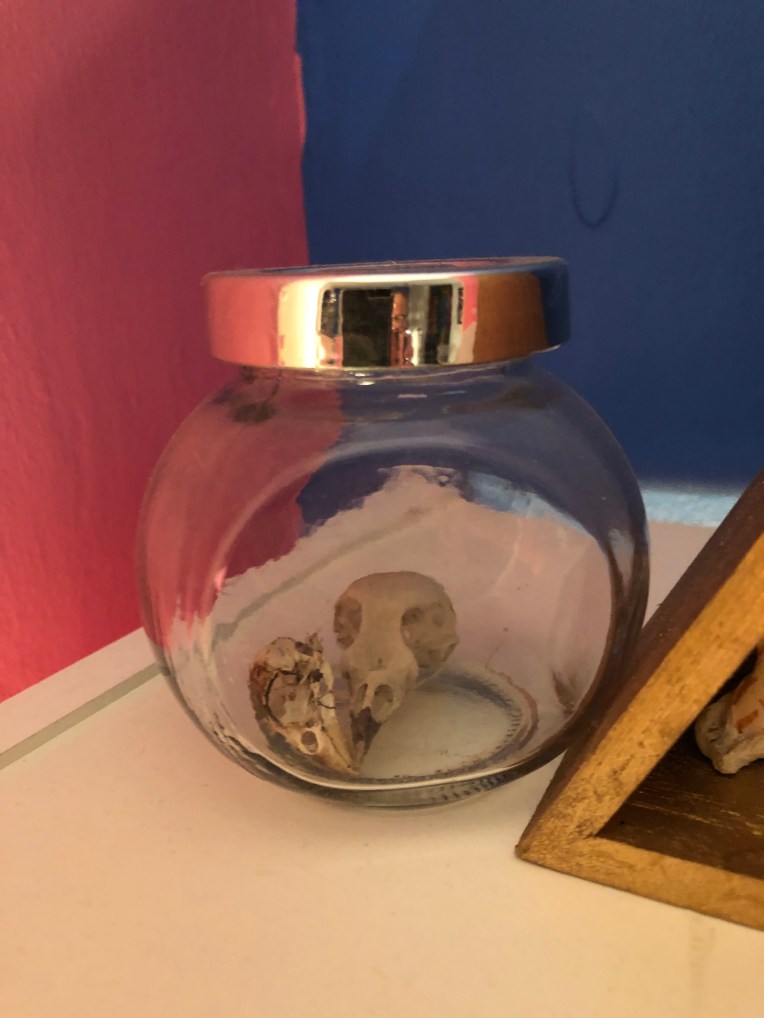
Glass Jar and Skulls
Next to the pyramid shelves are 2 jars, one contains tiny bird skulls that I found and used in art classes for drawing and painting skills.
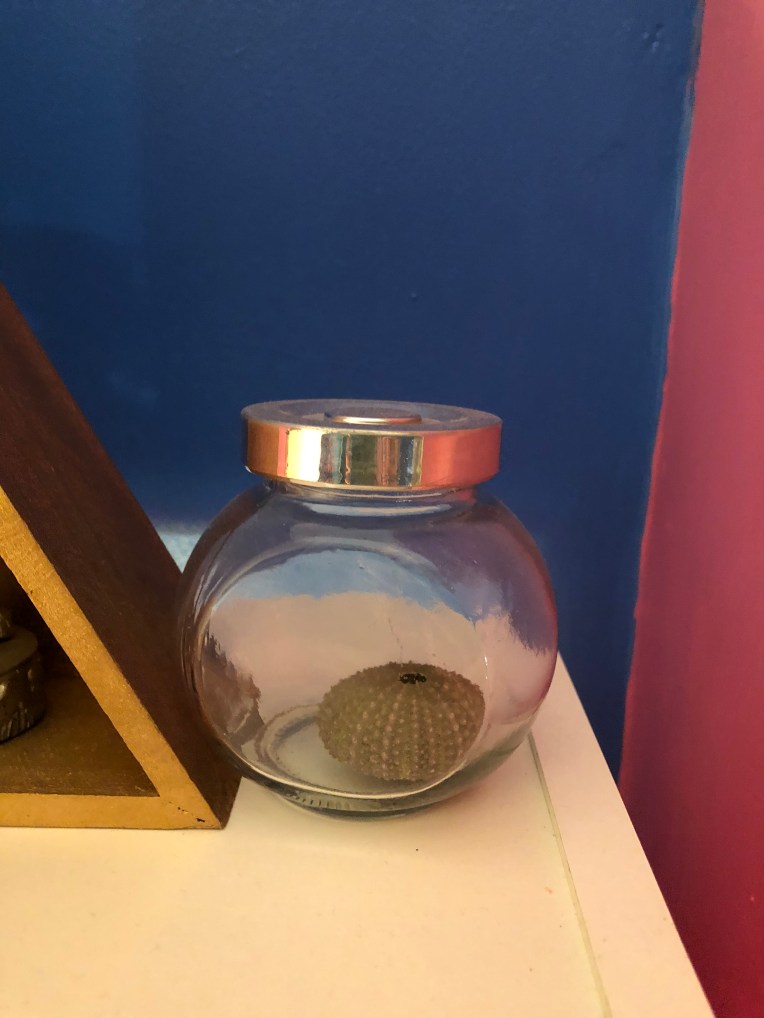
Glass Jar and Sea Anemone Skeleton
The other glass jar contains a Sea Anemone Skeleton that I found on a beach when I was on holiday a few years ago.
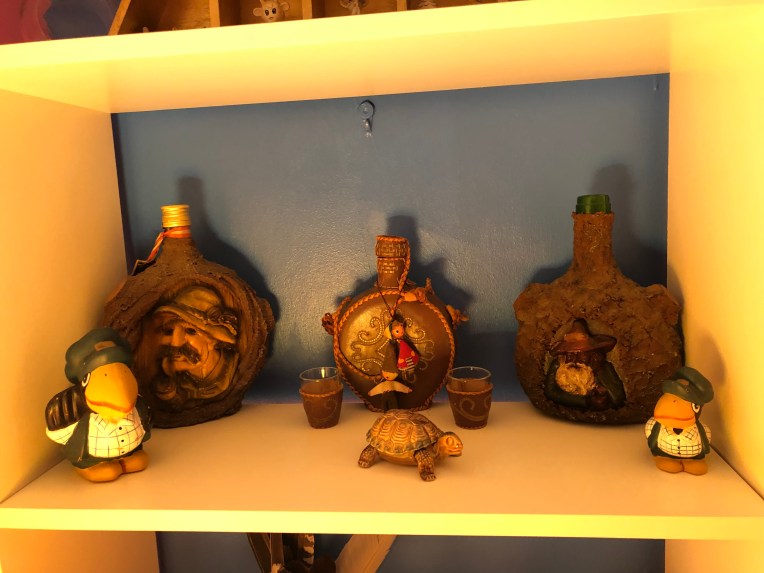
Decorated Bottles, Puffins and Tortoise
This shelf holds items that I inherited when my Grandma died. I have no idea of the origins of the decorated bottles or the puffins. The little tortoise is a holder, when you lift off the shell there is a place to keep small items.
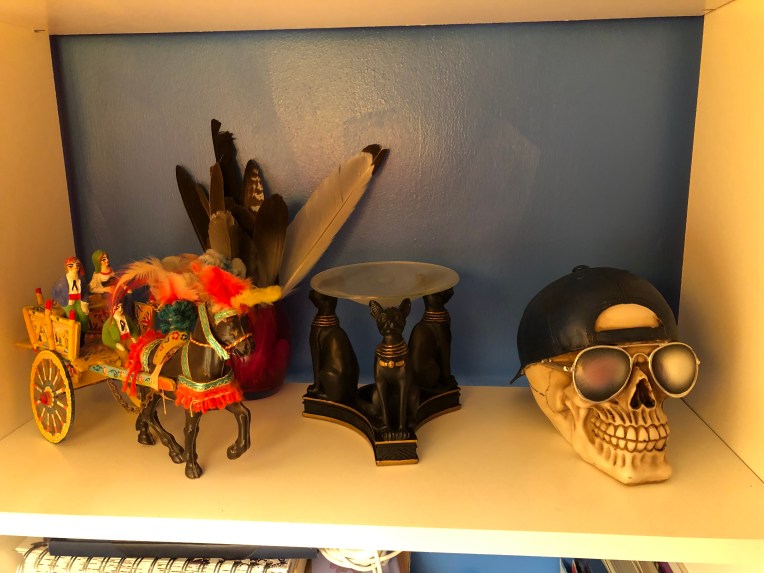
Horse and Carriage, Feathers, Oil Burner and Skull
The next shelf down is home to my Horse and Carriage that my Granddad bought back from one of his trips abroad. The oil burner was a gift from my manager when I worked in a pub and the skull was a present from my Dad a few years ago (it’s a money-box).
Another View of my Horse and Carriage, Feathers and Oil Burner
I’ve collected feathers for years and have chosen to display some of them in a pink candle holder on my shelf.
Shelf with Books and Buddah Ornament
This is where my “books to read” reside along with my filofax and other bits and bobs necessary for everyday life that I tend to lose! The Buddah ornament is a backflow incense burner that I bought a while ago from Amazon. (You can find backflow incense burners here) The bottom shelf (which you can just see…) holds books and the rest of my planners and diaries.
Artwork and More Shelving
This artwork is something I created on my Foundation Art Degree. I have placed it onto the chimney breast and placed a shelving unit below it as the chimney is not used anymore and the fire-place has been blocked up.
The small glass photocube was a present from my workmates when I left my last job.
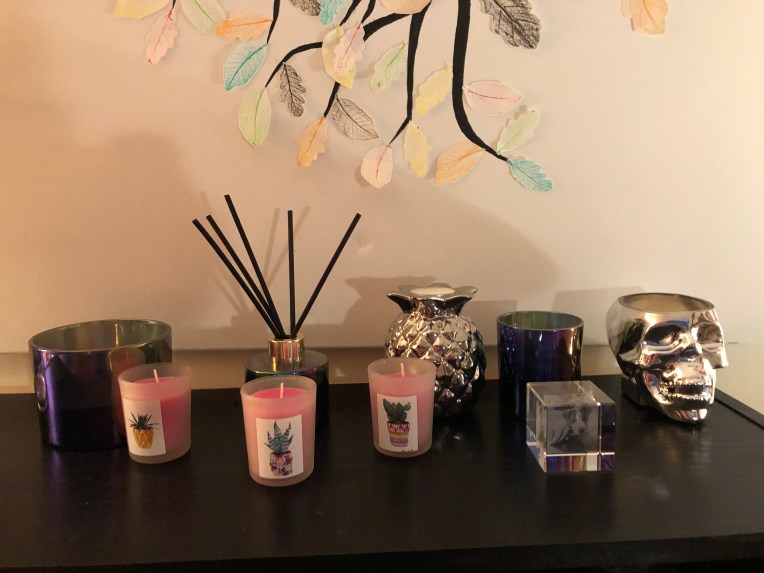
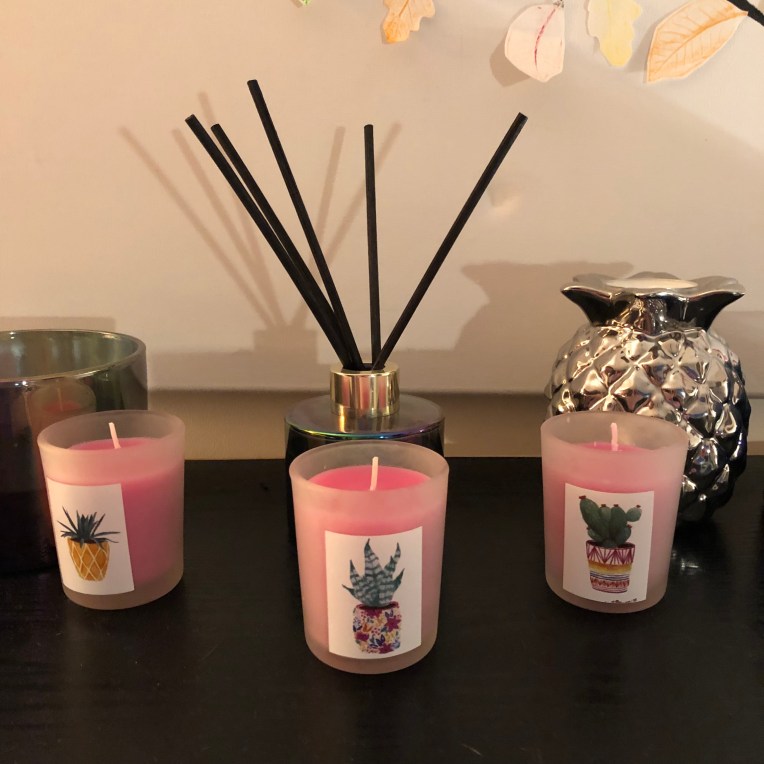
Candles and Reed DiffuserLlama Mug
My Mum bought me the Llama mug to use as a plant holder. It’s currently housing a silly dinosaur pencil!
Candles, Art and Squishies
The votive candle holders (S & R) came from Asda and stand for Suzi and Roxy! The squishie animals came from Wish.
Gemstone Bell Jar, Candles and Holders and Wooden BoxWooden Box
I can’t remember where I bought this little box from, its been in my possession for longer than I can remember. It currently keeps incense cones safe!
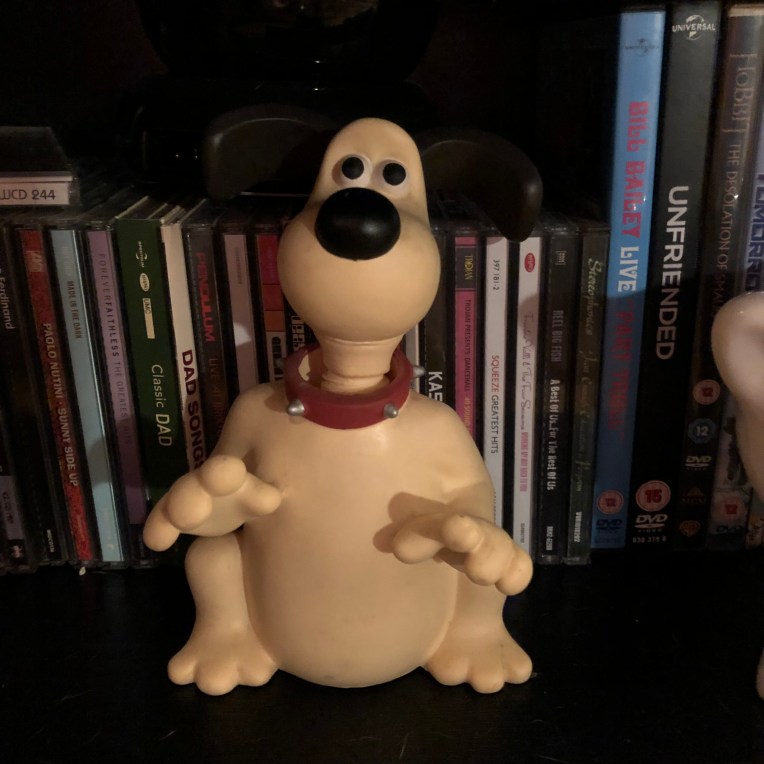
Gromit Head WobblerTroll
I had this troll figure (and the other one shown lower down in this post) as a Birthday present when trolls were all the rage first time around (in the late ’80s!) I’m surprised that I still have both of them given that many of my things from then have got lost over the years!
Cat Salt and Pepper Shakers
I love this pair and their cute faces! They are salt and pepper shakers that I bought for a uni art project several years ago. I have never used them for the purpose they were made for but as ornaments to have out on my shelves!
Cat Money Box
This was bought years ago from a charity shop! I use it to keep Roxy’s pocket-money safe!
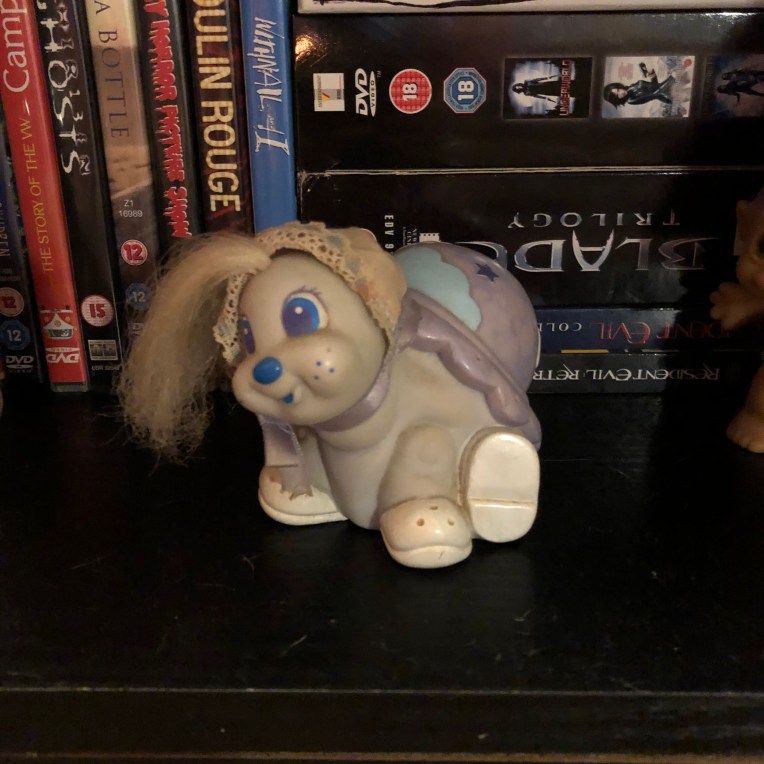
TrollKeeper
Another of my ’80’s childhood toys that has survived many moves!
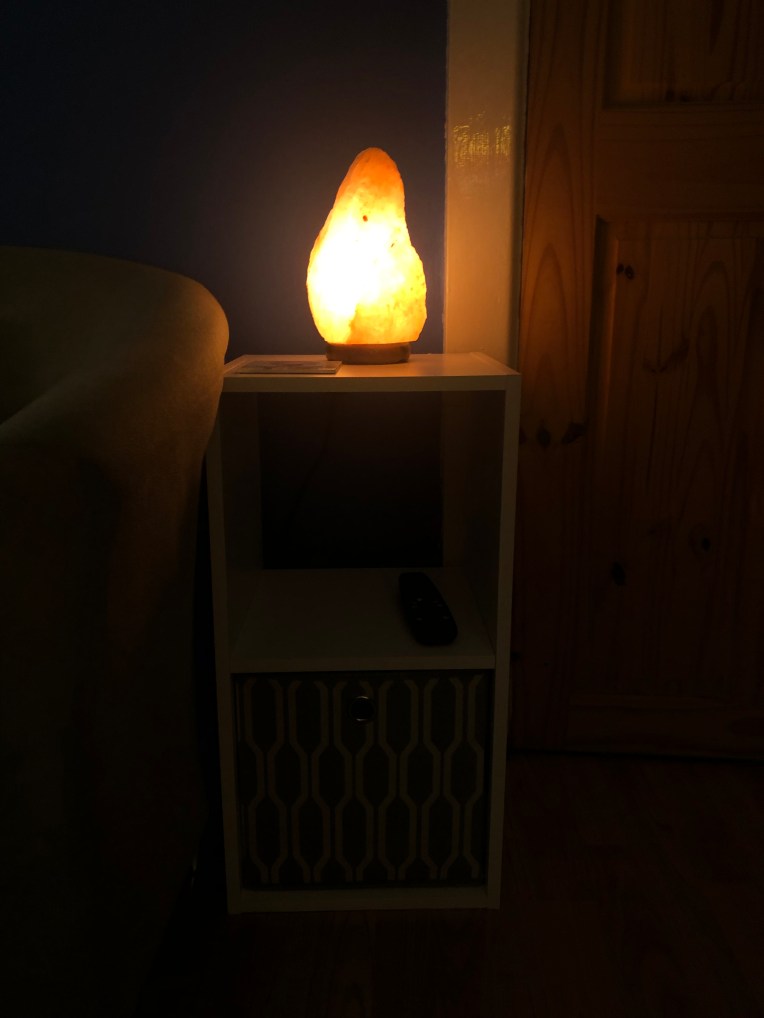
Salt Lamp and Side Unit
The salt lamp was a Birthday gift a few years ago. I bought the side unit and drawers from Argos to use as side tables as I didn’t have any. I have one for each side of my sofa and are perfect for putting a lamp on and holding a coffee cup. They are also perfect for hiding paperwork and magazines!
Coffee Table, Sofa and CushionsSofa and Cushions
The sofa is a new addition to my living room. I did have a sofabed in the space (you can see it here) but decided to move that to my spare room. I found this (and another one) exactly the same on Facebook Marketplace for £15 for the pair! The bolster cushions and covers are from Amazon (you can find similar covers here ) The rabbit cushion was a Christmas present.
Sofa and Side Unit
The anglepoise lamp on the other side of my sofa was given to me by my brother Richard when I moved in. I’ve seen similar in several different stores including Argos and Ikea.
Wall Clock
The wall clock is one of my favorite things! My friend gave me it a few years ago and I couldn’t decide where to place it. When I moved in here I knew that I would put it on the wall space behind my sofa!
Salt LampWall Picture of My Niece and Nephew
This picture of my niece and nephew was printed by Saal Digital. If you want similar then there are several places you can upload your own images from to be turned into wall pictures!
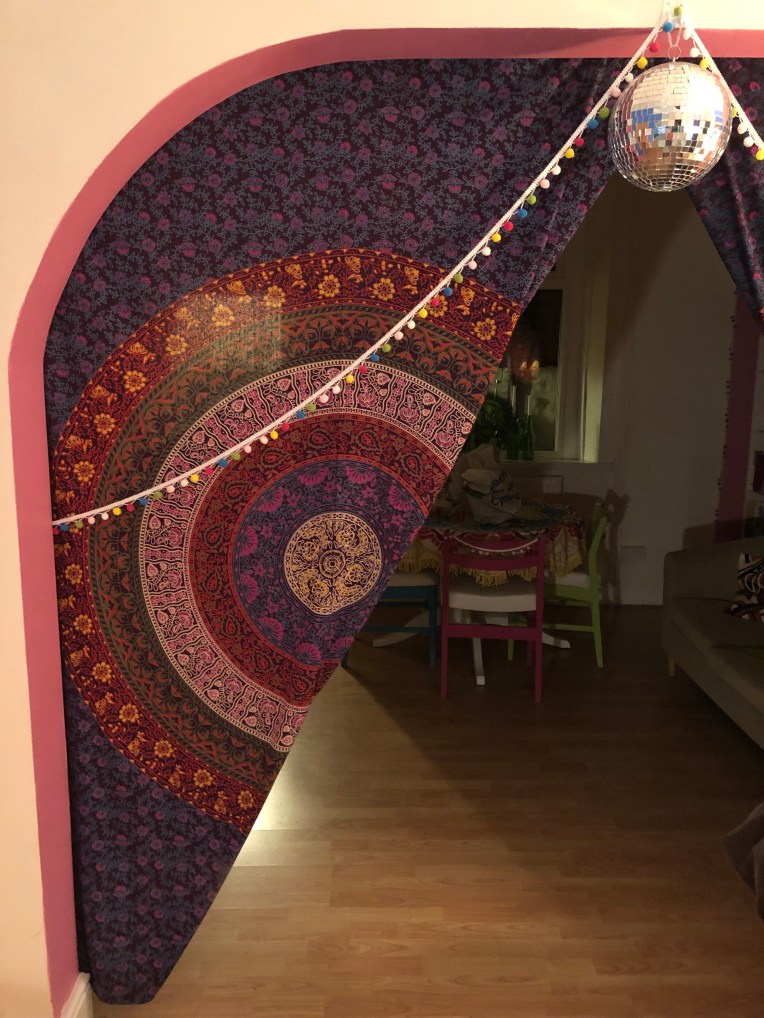
Disco Ball
I’ve had my disco ball for years and years and previously had nowhere to hang it. I’ve hung it in front of my room divider curtains.
Room Divider
One of my room divider curtains. I wrote a post about them here.
I just wanted to share that aside from being on Instagram I now have a page on Facebook which I will be sharing my blog post links to along with photos of things I am doing, inspirational images and other insights into my day to day life…
I have also created a logo to use on social media so it’s easier to find me! I used an app called LogoScopic Studio which I downloaded from the AppStore! It’s a really easy to use app that I found just by chance when looking at logo creators..
In the past I ran a few different blogs, I had one for my art and uni projects, one for my planners and diaries and one for beauty products but keeping them all going at the same time, remembering to write posts, schedule them, take photos, link back to products I used or other relevant sources, update social media platforms became a bit overwhelming. I struggled to think of content to write, write posts and get them published. It began to feel like I was writing each day and chasing my tail, not really getting anywhere. Eventually, I just gave up as it was all becoming a bit too much to keep up with.
Recently I had been thinking about things that I used to do for fun and realised I really enjoyed writing and sharing ideas and thoughts, and that I really, really missed blogging. In the beginning, when I started blogging I found the whole process of writing, taking photo and updating my blog to be fun and a way to relax, it was almost therapeutic up to a point. And I wanted that feeling back, I wanted the space to share art things, decorating tips and ideas, food, beauty, whatever I wanted to, or could think of writing about. I wanted to get back to blogging, maybe not with the intensity I had before but I still felt like it was something I really wanted to do.
I think the reason I failed blogging before was that I had several blogs all specialising in niche subjects and because of the nature of the blogs and their blog names I felt like I couldn’t add other subjects into the blog, that I had to stick with the given theme I had chosen. It took me a while to really think about what I wanted to write about and share on a blog and whether I wanted to really start a new blog. I wrote down subjects I wanted to write about and really thought hard about the type of blog these subjects would fit into, one that would give me the freedom to add any subject matter I wanted without having my readers wondering why I had added something that was “off theme”. I decided a lifestyle blog was the best style to go with, it would give me the freedom to write posts about art and decorating, alongside posts about what I was reading or thinking about.
So I started this blog as a space for me to share my life, experiences, ideas, thoughts and life with you. I started this blog as I enjoy writing and taking photos and because I find writing is a kind of therapy, it is something to help me mentally and somewhere I can log my life and look back on things I have done and ideas I have had. I started this blog to give people ideas and inspiration. That is why I created this blog.
If you are interested in the Story Behind My Blog Name you can find that post here.
If you blog, why did you start yours? What is your blog about? Do you write about a niche subject or something in broader terms?
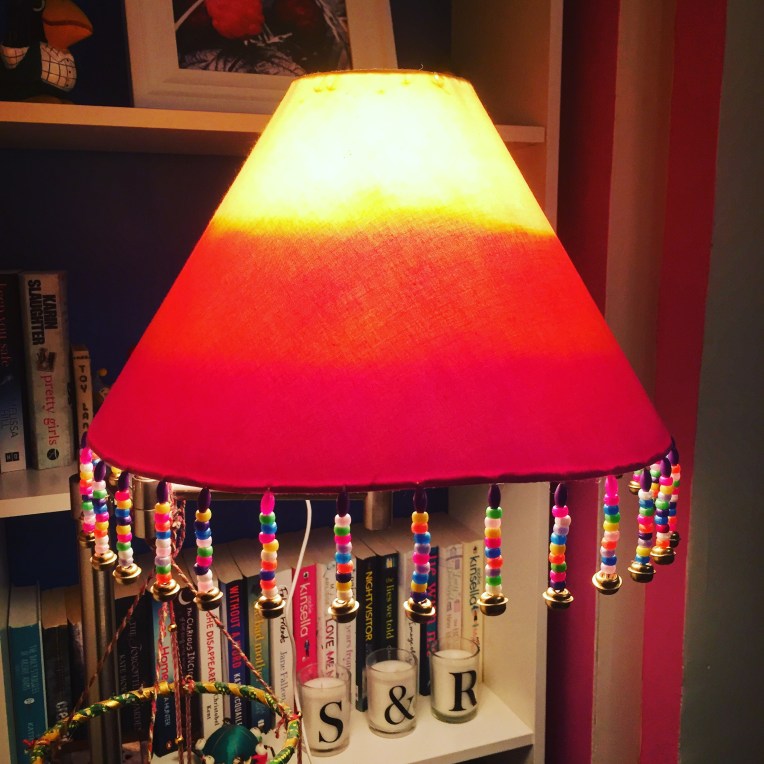
I’ve had the same plain floor lamp for as long as I can remember and while I love the actual lamp itself I’ve not really been liking the shade. I bought the lamp from Ikea years ago (so long ago that they don’t sell it anymore!), it has a fold out hinge so you can move the light around without disturbing the stand which I find perfect for reading under in the evenings. The shade that came with it was cream and seemed to pick up dirt and dust really quickly and forever looked a bit grubby which I really didn’t like so I decided that I would make it into something that I did like. I have to issue an apology now because I don’t have any proper “before” pictures except for this one where you can see the lamp in the corner behind my chair…
The first thing I did was to wash and dry the shade after removing it from the stand. I scrubbed it off in the kitchen sink with dish soap and a scrubbing-brush which seemed to remove most of the dirt and dust. I left it overnight to dry off.
The next morning I decided that I was going to either paint it with acrylic paint or attempt to dye it. As I was running low on paints I figured I’d have a go at dying it. I had some leftover semi permanent hair colours in yellow, orange and pink shades so watered them down a bit. I then began applying the dye in bands around the shade with a paint brush.
I started with the yellow then worked my way down to orange before finishing with the pink. I left it to dry overnight again before rinsing off any residue in the sink. The colours blended together a bit and they faded down once rinsed and dried off again but I was happy with the outcome.
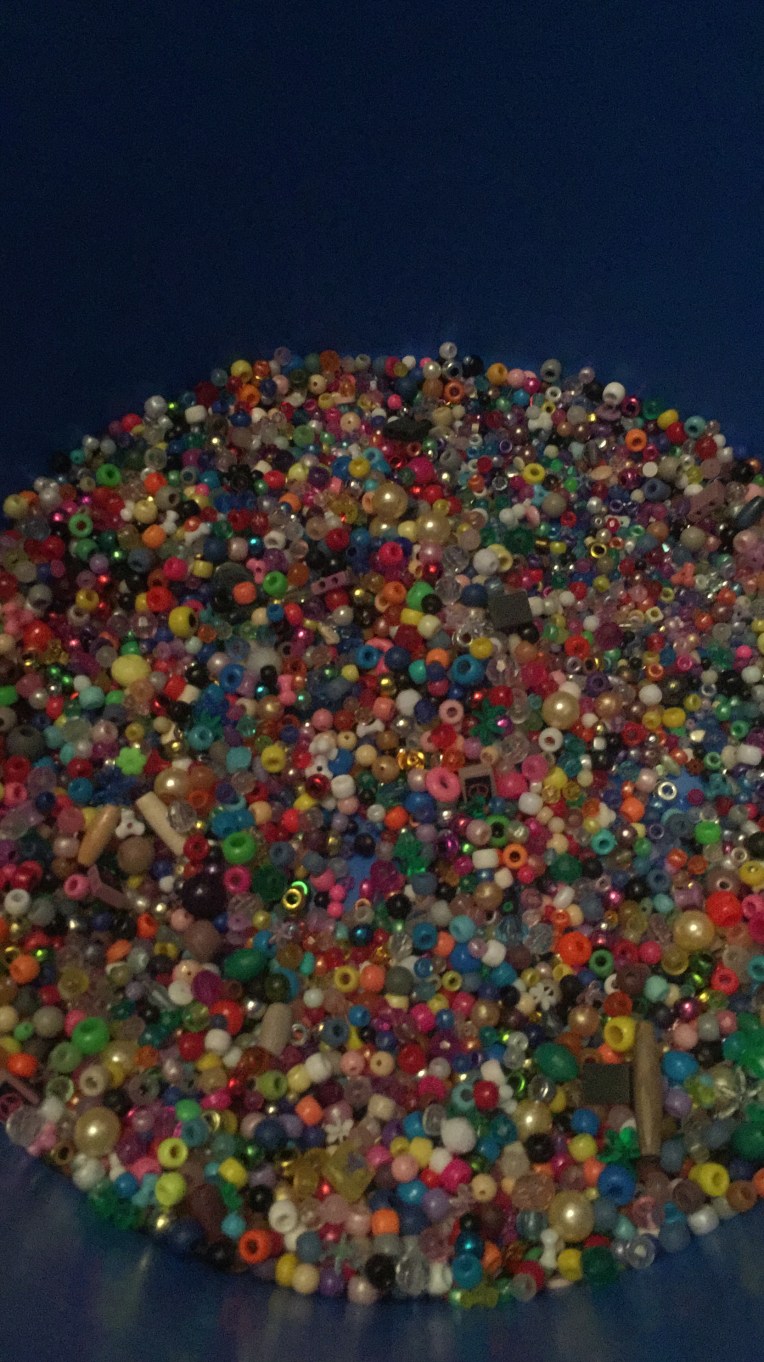
I then decided to add a beaded fringe so raided my bead collection for suitable beads
I decided to use small pony beads and finish the fringe off with small brass bells. I measured the circumference of the shade at its widest end, marked 1 inch sections and marked with a small pencil mark then, working from the inside rim, used a needle and thread to puncture a hole where I wanted the fringe to be. I added beads then a bell before passing the needle back through the beads and back through the hole I had made, then moved on to the next 1 inch mark before repeating. I worked this way, all around the rim before tying off and completing. Once finished I reattached the shade to the lamp.
What do you think of my handiwork? What other uses do you think hair dye has?
Some of you may have noticed the appearance of a little fuzzy head in some of the photos I have shared on this blog, and today, that little fuzzy head turned 4!
I’ve had Roxy in my life since she was a teeny tiny pup and in that time we have been on many adventures together – camping, festivals, long walks where we get lost in nature and the biggest so far – moving to my own home, just me and her. She’s my shadow, always beside me wherever I go, whether its laying on the bathroom mat while I have a bath, cuddling up to me on the sofa when I want to read or watch tv, sitting in the kitchen while I cook and clean, she is always there.
She’s funny and sweet, understands more than she lets on, she listens and talks back in that way only dogs and their owners would understand and she brings me so much joy every day. So today, Roxanne, I’m celebrating you and how wonderful you are! Happy Birthday Puper!
I know it’s only *just* November but there are so many things I need to start and work on this month for Christmas that I thought I’d share a little to do list with you all, and so I can hold myself accountable for things I need to get done this month so here is the list in no particular order
Write a Christmas gifts list and decide what I’m giving people
Photo by Pixabay on Pexels.com
I am on a tight budget this month and need to really think about how much I can afford to spend and what to give people. I like to give meaningful gifts that suit the recipient and am choosing to make some gifts instead of buying things that are mass produced.
Research and buy items to make gifts
Photo by Adrianna Calvo on Pexels.com
I’m considering making scented candles and possibly baking some treats to give to people this year as gifts with a posibility of creating small hampers for family to enjoy so really want to research the best recipes and best items to purchase to make gifts along with knowing the steps involved in creating the gifts.
Deep clean the house
I really like to dust and clean everywhere before I think about getting the decorations out and putting them up, it gives me a chance to put some things away and make space for the festive bits and bobs to go up too!
Decide on Christmas decorations and what I need to make/buy
Photo by freestocks.org on Pexels.com
I don’t have a lot of Christmas decorations, in the places I have lived before the decorations I had access to were not all mine. This year is a chance for me to really think about the kind of decorations I want and how I want my home to look. I’m leaning towards a pastel/colourful/kitsch sort of theme with some upcycled elements to fit in with it.
Plan for my Crafternoon (I’m holding a fundraiser for Mind on the 1st December) including drinks, activities and food.
I’ve been in my home since the end of June and have yet to have a housewarming or many friends over. I usually don’t have many friends over due to my stress, anxiety and aspergers, but I’m really looking forward to planning and hosting this event! My friend Jez will be helping me to sort it all out so that helps a ton!
Remember to put the recycling out!!!
I seem to always forget that wednesday is the day they come to empty the bins and collect our recycling until I hear them going down the street or seeing my neighbours empty recycling boxes on the street. I really must start to write it down on my calendar and put a reminder in my phone!
Clean and tidy up for my house inspection (eek!)
I have my first house inspection on the 24th of this month. The housing association I rent through are coming to give the house a once over. I have no idea what to expect but want to have the place clean and tidy (not that it isn’t) and super presentable for their visit.
Meal Plan
I really need to start planning my meals properly again, when I was in work (before being signed off due to my anxiety and stress) I planned the majority of my meals, especially my breakfasts and lunches and was really good at eating at set times but since I have been off from work I have not really thought much about what I’m going toeat or when. It has been really hard as the medication I have been taking has been making me feel sick and put me off food completely. I have been surviving mostly on junk and toast and that needs to change. I really need to step away from the snacks and start cooking properly again.
Take photos for upcoming blog posts
Photo by Alex Fu on Pexels.com
I have several posts lined up that I want to get completed and scheduled for publishing so really need to work on tking the photos to accompany the posts. I am going to try and get most of the photos done at the beginning of this month so all I need to worry about is writing the posts!
Continue working on Mums Christmas present (I’ll share it in the New Year after she has recieved it!)
I’d really love to share what I’m creating for Mum at the moment but I really don’t want her to find out what I’m up to and for it to spoil her surprise until the actual day. All I can say is that I’m nearly half way through at this moment in time and really need to crack on if I’m going to get it completed in time!
Make Christmas cards for family
I’m still undecided on wheter to make Christmaas cards or not this year. I really like making cards and haven’t done so in a long time so it feels like it could be a good idea. The main thing that is making me unsure is how much time I’ll have between all the other things I want to do for Christmas…only time will tell I suppose!
I have other things on my to do list, the normal mundane things like my cleaning routine, normal shopping, doctors appointments and bills to pay but they happen every week/month/year and are things that most poeple have on their lists too…the items I have shared are much more interesting (well, I think so!)
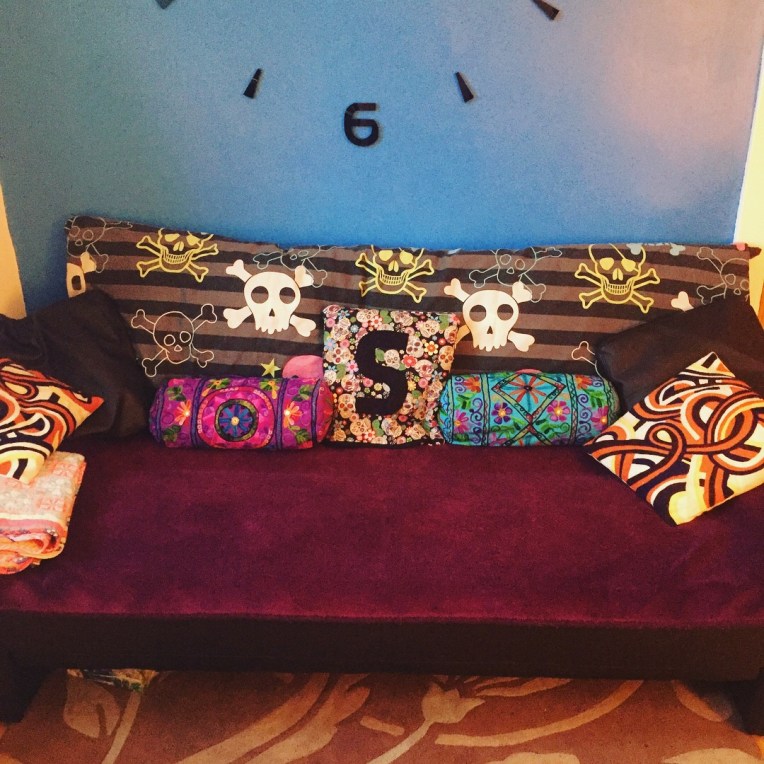
I have a sofa bed that I’m currently using as my day-to-day sofa and as a sofa it’s not really that comfortable. The sofa back drops down to create the sleeping area and when the back is up it has 3 or 4 different setting that you can angle it to on a click mechanism. I find that the back is not at the right angle for me, it’s either too straight up, or leans too far back for my seating position to be comfy. The actual seat part of it is too narrow to sit properly on it or even to lounge on either. I decided that it would be more comfortable to use it in the bed position with the back fully down but this means that the seat area is a bit too wide to sit on and lean back without it feeling a bit awkward. I decided that what I really needed was some kind of cushion or many cushions that could act as a back rest so, as usual, I looked on Amazon first. I found some really nice cushions that would work for what I wanted but they were either too expensive or would take forever to arrive so I began to think about other things I could use or if I could make something that would work instead…
I had a few old cushion inserts that I wasn’t using along with a few old duvets and a cover that I liked but wasn’t getting used anymore so I decided to try to make one.
Firstly I got the duvets and laid them down on the floor, lined up the edges of them and laid the cushions out on the duvets. I wanted to wrap the cushions with the duvet so I placed the cushions a little way up from the end of the duvets then folded the duvets over the cushions in order to create a pocket for them to be contained in.
I then sewed up the pocket edge using a rough overcast stitch (over and under) that runs from the bottom corner of the pocket to the top. I did this so that the cushions wouldn’t move around so much and so that everything was a bit more secure. I didn’t really want the cushions and duvets to unroll once inside the cover.
I then rolled the whole thing up and secured the middle of the roll with another set of stitches in order to stop the whole thing from unravelling. I also stitched the corners of the duvets down so they didn’t curl up or move about.
Finally, I used an old duvet cover and placed the cushion I’d made into it and folded the cover over and around it. I wanted to be able to remove the cover and wash it easily in the future or be able to change it over if I wanted to.
Heres the finished project!
I’m really happy with how it turned out. Making this has meant that I have saved money on buying cushions or even needing to buy a suitable sofa for a while. I now have a super comfy area to sit and read that I’m able to either sit or lay on and use!
What things have you made that have improved items you own?
I’m finally on the last part of the posts about my dining chair upcyle project (Part 1, 2 and 3 can be found in the following links – Part 1, Part 2 and Part 3 ) and today I will be sharing the finishing touches that I have added, lessons I have learned and how much the project cost per chair.
Firstly though, the finished chairs…
I finally finished the chairs, it took several weekends to complete but I’ve done it and am really pleased with the outcome! The final finishing touch that I have added is some pompom trim that I used for the alcoves when I decorated the downstairs which I purchased from Amazon (if you missed that post you can find it here) . I decided to add the trim to add a further element of co-ordination into the colour scheme and design of the room and I feel that it pulls all the elements together really well. I like the idea that people will notice all the little touches and will allow their eye to investigate the room in greater detail.
This chairs project was really my first major foray into the world of upcycling and upholstery. I have not worked on a project quite like this before and along the way have learned a few lessons…
However long you think it will take, double it and add an hour. Sanding the chairs was probably the longest part and I couldn’t believe how much time I spent clearing the old varnish from the frames of the chairs.
Clearing all the varnish and stripping the frames back to bare wood is the best thing to do for the paint to adhere properly. Failing to clear all the varnish, like on my yellow chair, has resulted in patchy paint and the colour of the varnish bleeding through all the coats of paint I applied. It still looks patchy now and seems to be more noticeable at the bottom of the legs.
Sometimes it pays to sit back and think a bit…I tried to create a fancy curved corner and edge on the first seat that I tried to upholster which didn’t really work and frustrated me when it didnt go to plan. I should have sat and thought about what I was doing and ways to cover the seat before starting.
Have fun with your project. Think about what is fun and makes you smile and go with what you think will work. The worst that can happen with a project like this is that you have to sand the chair down and start again.
And here are the costing calculations on the attached document…
So, in all the chairs cost £17.63 to upcycle which doesn’t seem too bad when you consider that I have bespoke, one of a kind, unique chairs that fit my home and style perfectly and I have had the experience of learning new skills along the way. And I’m proud to show them off and say “I created these”. I would recommend to anyone that can’t seem to find furniture that they completely like or keep finding thing that are not quite right to go out and see what is available for sale second-hand and try your hand at creating something that you love!