DIY Gift Ideas

Most people go out and buy their friends and family gifts but there is something nice about making a gift for someone, and something really touching about receiving a hand-made gift from a loved one.  There are lots of different gifts you can make so today’s post is a little bit of inspiration (along with links to instructions and where to buy things that you may need in order to make the gift.)

  • For someone who loves scented candles…

blur burn burning burnt
Photo by Pixabay on Pexels.com

Why not make your own to give as gifts?  You can get kits that are reasonably priced in most craft shops (such as this kit for £10 from Hobbycraft)  If you have never made candles before then a kit is the perfect way to start, and should you want to then continue making candles you can buy all the items you need individually both on-line and in craft stores.  I really like these tins that you can use as candle holders.

  • For the one with a sweet tooth…
brown pinecone on white rectangular board
Photo by rawpixel.com on Pexels.com

How about having a go at making your own fudge or toffee?  You can then present it in a cute container, tin or jar.  There are lots of recipes online and heaps of handy instruction videos, but I’m a fan of this one for fudge (its super quick to make and tastes amazing!) and this one for toffee (I could eat this all to myself!).  You can get really pretty tins, jars and other containers in most supermarkets now and its worth checking out the cheaper shops to see what they have as well.  I really like the look of Kilner Jars or these clip lid jars from Wilkinson .

  • For the Fashionista
adult beautiful elegant eyewear
Photo by freestocks.org on Pexels.com

Nothing would be more fabulous than a one of a kind t-shirt.  You can buy plain t-shirts fairly cheaply in most clothing outlets and supermarkets so why not buy one and customise it?  You can use fabric paint from any craft shop (I love the Tulip range as they have lots of different finishes).  You could create a t-shirt with the recipient’s initial on it, a tie dye top, or even add in sewn elements like pockets or a collar depending on their fashion tastes.

  • For the Beauty Lover
bath-splashing-ducks-joy-162587.jpeg
Photo by Pixabay on Pexels.com

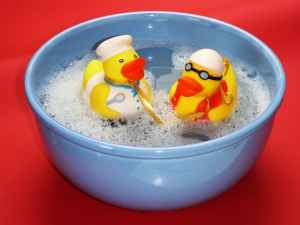
Home made bath bombs are a really lovely gift to make and receive.  You can customise the scent to match the recipients favorite scents or add elements such as popping candy or petals, and make them any colour or shape you choose.  There are some fab tutorials available on-line, my favorite one is this one over on youtube .

  • For the Jewellery Magpie
beaded assorted color necklace lot on shelf
Photo by Artem Bali on Pexels.com

A cool necklace or bracelet to match their style or personality always goes down a treat and doesn’t need anything more than some waxed cord and some pretty beads in the recipients favorite colours.  You can add items like small charms or shells, pretty ribbon or chains.  I really like this store for my jewellery making supplies.  The beauty of making a gift like this is that it can be as simple or intricate as you want it to be and can be created regardless of skill level.

  • For the Blogger
brown pencil on black and green book
Photo by Pixabay on Pexels.com

A notebook is always a welcomed gift (talking from experience) and if you know anyone who blogs then why not gift them a customised note-book?  I really like Kraft books for customisation purposes and they are pretty cheap to pick up too, though you could choose any plain hard backed book.  Once you have chosen the book you can let loose with your design, maybe you could personalise with the recipients blog name or a favorite hashtag?  And if the blog has a theme (like recipes or food for example) you could decorate the front and back to match.  The fab thing about a personalised notebook is that you can decorate with any material you want, whether it be painting something onto it, sticking things like feathers and sequins on to it or decopatching it, the possibilities and customisation possibilities are pretty much endless!

  • For the Student
img_0500
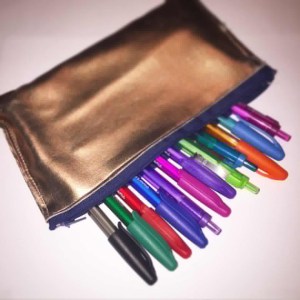
Here’s one I made a few years ago!

Fabric can be bought in many different places these days and in tons of different designs so why not try your hand at making a pencil-case or zip close pouch for the student in your life?  I really love fat quarter fabric bundles and experimenting with making my own zipped pouches and they are super useful, not just for pens and pencils, you could make smaller ones to gift as coin purses, larger ones for makeup or even to keep an e-reader in.  I love the fat quarter bundles you can get at Hobbycraft though you can buy these at most fabric or craft shops and you can pick up zips there too.  I found the Wikihow tutorial really easy to follow!

  • For the Photographer


77340a2eec933a5a8ea5d0093a60c8a4
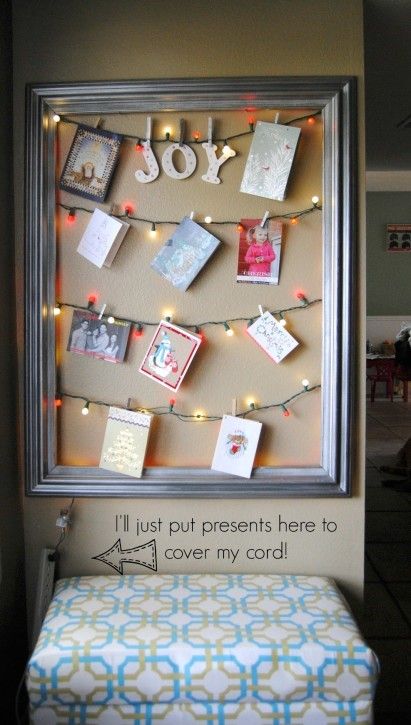
I really love the look of this one, unfortunately, I can not credit the source as I can’t find the original post however, the image has been shared on Craftionary – https://www.craftionary.net/decorating-lights-20-diy-string-light-projects/

As a photographer, there is nothing better than taking photos, printing the best ones and displaying them around the home.  A DIY photo display using an old picture frame, some cheap string lights and some tiny pegs would be a lovely gift to receive, especially if you added prints of your favorite photographs that they had taken too.  You can find old picture frames in charity shops, at boot sales and local selling pages and can customise to suit by spraying with a colour of your choice, after removing the glass and back of the frame before adding a string of fairy lights.  Once the frame has been put together add the chosen photos using tiny pegs like these.  If you wanted to, you could add to the back, a piece of fabric or wallpaper with a cool pattern or design on it or just leave the back open.   The beauty of this gift is that new life has been given to something old, its been re-purposed and upcycled, the pegs mean that the images displayed can be switched around easily and there is the flexibility to display anything you want, from photos to lists.

  • For the Book Lover
woman carrying black mockup tote bag
Photo by rawpixel.com on Pexels.com

Instead of gifting another book token, how about crafting a customised tote bag for the book lover in your life to carry around their books in?  If you purchase a plain tote bag (like the one here) you could use some printable fabric transfer paper (which you can find in most good stationery, craft or fabric shops) to print out and iron on to the bag a quote from the recipient’s favorite book.  To make the bag extra special you could use beads, buttons or sequins to enhance the quote.

  • For the Foodie
bowl being poured with yellow liquid
Photo by Pixabay on Pexels.com

My Dad loves cooking and I have made him flavoured oils a few years running.  You can make almost any flavour of oil that you want but I have found that things like rosemary and thyme, garlic and chilli seem to give the best flavour pay off, not only that but the oils can be used in cooking, as salad dressing, dips and many other things.  The method I use is …

  1. Cut up whatever ingredient you are using to flavour the oil, and bruise it slightly so that it starts to release the flavours.
  2. Warm up some olive oil, you want it to warm, not bubble or boil.
  3. Add the cut up flavorings and stir gently at intervals over about 10 mins while the oil is still warming.
  4. Remove the oil from the heat and leave to cool.
  5. Strain the cooled oil to remove the bits of flavoring.
  6. Before adding to bottles, I always add fresh flavour ingredients, such as a sprig of rosemary and thyme to the bottle that will have the rosemary and thyme oil added to it (this adds a bit of visual interest and lets you know at a glance which oil is which)
  7. Add the oil to the bottle and seal.
  8. Add a tag or sticker with the oil used, flavoring and when it was bottled.

You could give several different flavoured oils to your recipient along with a little leaflet about what you could use the oils for.

  • For the Eco Friendly
11-DIY-Soap-Dispensers-To-Dress-Up-Your-Sink-3
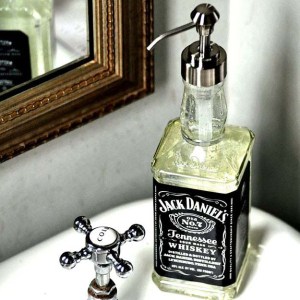
I found this image here https://diyjoy.com/craft-ideas-diy-soap-dispensers/#

How about creating a unique soap dispenser repurposed from an old bottle?  You could choose an empty bottle of their favorite tipple, sauce or an old glass oil bottle.  Just clean out the bottle and use a pump top (I found this but you can find lots via a google search) just make sure that it will fit the bottle you will be using!  There are other ideas here, which is where I found the above image!  You can give the dispenser empty, or why not fill it with a lovely scented hand wash?

  • For Your Partner
cc2c5cc14444094b062404df714ea70a
Image from https://www.pinterest.co.uk/pin/479774166545105449/?lp=true

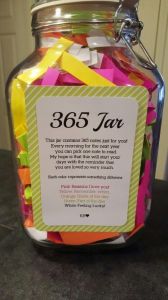
For a gift that shows you really care how about a 365 Jar?  Write down memories, songs, reasons why you love them, fold them all up small and put into a jar.  The idea is that they get to pick a new note each day to read right from the 1st Jan to the end of the year.  You can get really pretty jars here though any glass jar will do so long as it has a wide mouth to it.

  • For Your Bestie
close up of christmas decorations
Photo by Chwastek on Pexels.com

What would be nicer than a friendship package?  You could include a small hand-made candle, a bath bomb, a CD of both of your favorite songs, a little book with photos printed out of the pair of you along with little notes about the day that they were taken.  Package it all up in a pretty gift box or wicker basket along with some chocolates or treats that you know they would enjoy.

What sort of gifts will you be making?  And what would you love to receive?

Project Make – Christmas Decorations

Today on the blog I’m going to share with you instructions on how to make some simple Christmas Decorations.  These decorations can be made by adults or children and will add a fun element to your interior decor for the season!

The first decoration I am going to show you how to make is a 3D Snowflake

img_0594.jpg

For this project you will need…

  • 6 sheets of white paper (or any colour of your choice) I used white A4 printer paper
  • Scissors
  • Double sided tape or stapler
  • A hole punch
  • Cotton or string to hang

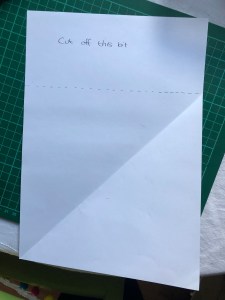
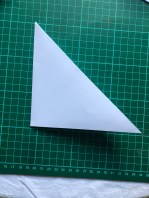
img_0569img_0691 If you are starting with rectangular paper (like I am) the first step is to cut it into a square.  To do this I folded the paper diagonally then used the straight edge as a guide and trimmed off the excess.  You will need to do this to all 6 sheets of paper.


img_0692

You can save the cut off piece and use it to make paper chains later!

img_0693

img_0573


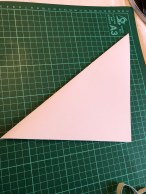
The next step is to take your square of paper and fold it along the crease you initially made then fold the triangle in half again. Again, this needs to be done to all 6 pieces of paper.


Once you have done this you can now begin to make the cuts in the paper.  Using the longest side as a guide, cut straight lines up the paper leaving about 1 cm uncut.  I work from the double edge fold to the single edge fold but it doesn’t matter which way you cut the paper.  Aim to make 5 or 6 cuts of equal width.

img_0577

img_0579


When all 6 pieces of paper have been cut in the same way you can then open the paper out.

Now we can start to construct the snowflake.


img_0581img_0583img_0582

Place the paper as in the picture above (with the spine that is uncut running vertical), start in the middle and apply a piece of double-sided tape to one of the points of the triangle, roll it over and attach to the opposite side point so that it forms a tube.

Flip the paper over and then do the same to the next triangle point, then flip and repeat.  Do this for all the triangle points.img_0585

You should end up with something looking like the above picture.  Repeat for the other 5 pieces of paper.

img_0586img_0587img_0589

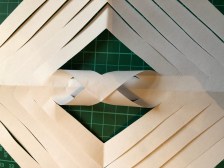
Once all of the snowflake segments have been made lay them out.  You will notice that one side has a bigger length than the other, make sure they all face the same way.  You then want to attach them together using either double-sided tape or a stapler, big side on one to small side on the other, attach at the crossed part (like in the middle picture above).  Once you have done this and attached all of them together you will then want to secure the centre points, I stapled 3 points together, then the other 3 then stapled the whole lot together (see the last picture above).  Once you have done this you can then attach the last snowflake segment to the first, making the completed snowflake.

img_0591           img_0592

The last thing to do is punch a hole in one of the outer edges of the snowflake and add a piece of cotton or string so that it can be hung.  You can make bigger or smaller versions of this by varying the size of the square of paper that you start with.

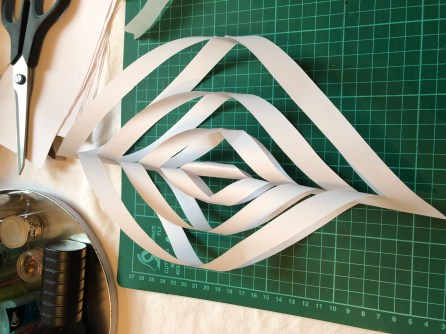
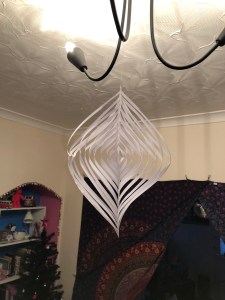
Using the same method as above you can create teardrop spinners to hang.  img_0627

Just take one piece of paper, fold as above and trim excess (if starting with a rectangle), then cut the paper as before but aim to make the width between cuts around 0.5cm or narrower, open the paper out and, like before, start in the centre and attach point to point, flip and attach the next one, flip back and attach the next until you have attached all points, hole punch at one end and attach cotton or string and hang.

img_0624                       img_0625


The next decoration I’m going to show you how to make is one that you can make with children and is really simple…

Toilet Roll Snowflakes

For this decoration you will need

  • empty toilet toll tubes
  • scissors
  • stapler
  • paint
  • glue (PVA works best)
  • glitter
  • hole punch
  • string or cotton to hang

(hover your mouse over the photos for the instructions!)


What decorations do you make for the festive season?


My Christmas Decorations

My style can be described as being bright, fun, non-traditionalist, hippy and boho, and my Christmas decorations really embrace my style.  I’m not a huge fan of tinsel or traditional Christmas decorations, though I do add elements of the traditional into my decor.

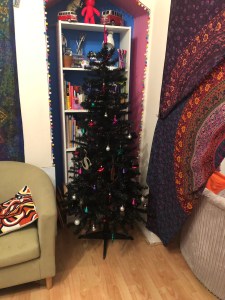
I have Christmas trees, fairy lights and stags,but not in traditional colourways, I prefer white or black trees, my stag decorations are bright pink and glittery, instead of tinsel I choose bead ropes, marabou feathers and pom-pom trim.  I have really bright baubles on my black tree and have chosen little dinosaurs to hang from my other, scroll down to see the photos that I have taken of my non-traditionalist, seasonal decor!

img_0472

I didn’t want to hang my wreath on the front door because, well, its Wales and it rains!  Not just that but I really didn’t want to get him all dirty either.  I hung  my wreath on the next available door – the door to my downstairs living room.

img_0473

Joy lights which I have placed on the shelving unit opposite the door to my living room.  This is the first thing people see when coming into my home.

img_0460

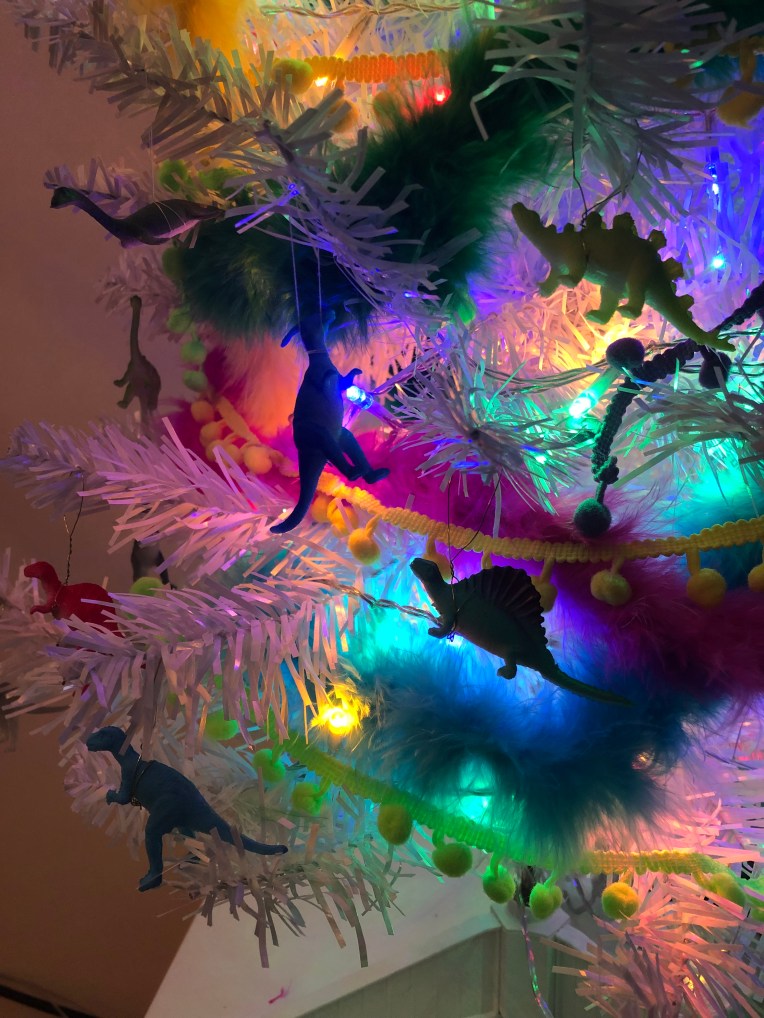
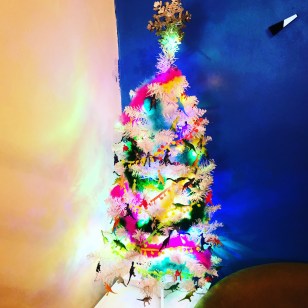
My small tree that I have decorated with multi-colour fairy lights, pom-pom trim, marabou feather trim and tiny plastic dinosaurs!

img_0458

Here’s a close up of the dinosaurs!

img_0465

My second tree which is decorated with beaded ropes and baubles.

img_0476

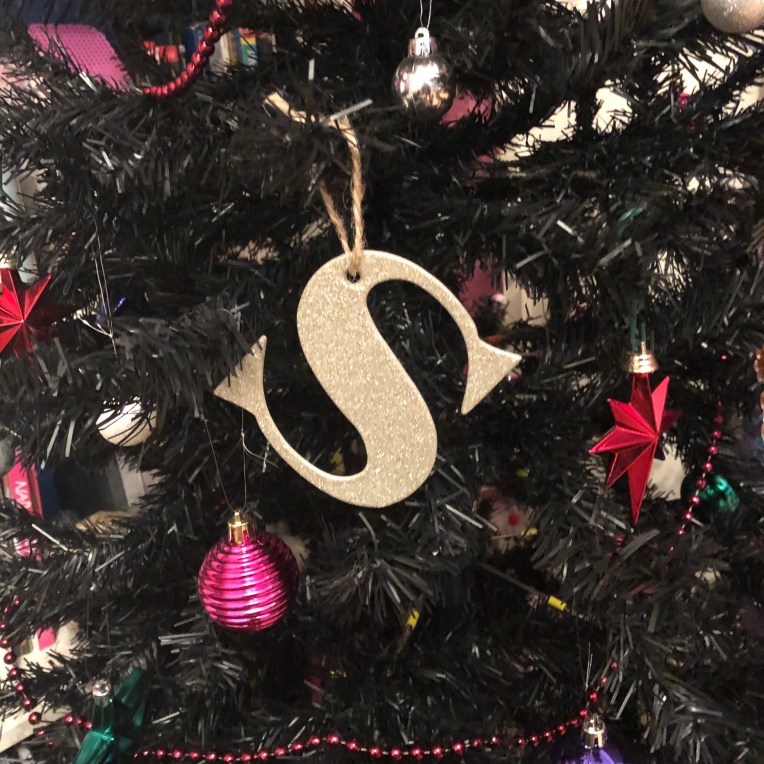
A close up of one of the decorations on my black Christmas tree – my initial!

img_0477

Pink stars, green stars and purple stars also adorn the tree.

img_0478

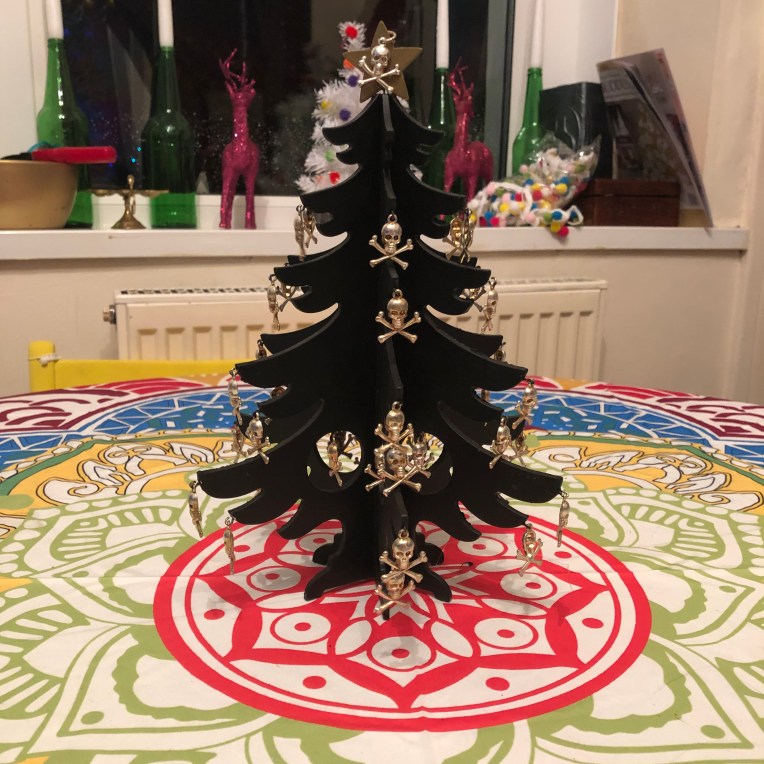
Skull and Crossbone upcycled tree which I’m thinking of having as my table piece for Christmas dinner.

img_0480

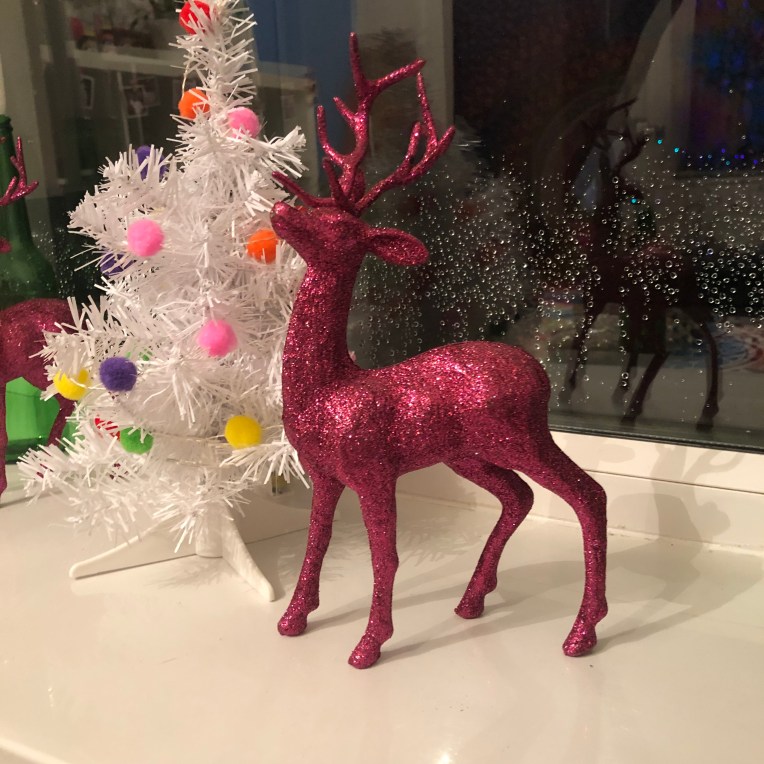
My pink glitter stags, my mini Christmas Tree and its pom-pom decorations (which are also lights!) on my back windowsill.

img_0479

Here’s a close up of one of the stags!  I’m really liking the effect the rain on the window has!

img_0474

And lastly, my santa card peg fairy light garland.

How have you decorated your house for christmas?  Do you have a theme or colour palette that you use?

Christmas Decorating Ideas

There are so many different Christmas decorations available now, from cute, retro funky baubles to minimalistic metallic ones.  With the array that is on sale its easy to get overwhelmed so I’m here today to give you some ideas with your Christmas decorations!

I think the easiest thing to do when deciding which decorations to choose is to first come up with a theme and colour palette before actually purchasing any decorations. Here are a few that I really love….

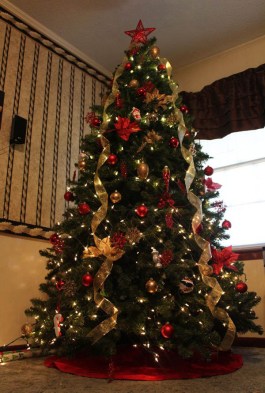
Traditional – Green, red, gold.

most-beautiful-christmas-trees-12
Image source https://christmas.365greetings.com/christmas-decoration/beautiful-christmas-trees.html

Minimalistic – Metallic silver and one colour.

Black-and-white-christmas-tree
Image from https://www.christmastreeworld.co.uk/blog/

Bright – Pink, blue, yellow, orange, lime green.

img_0461
My Bright Themed Christmas Tree

Pastel – Baby pink, baby blue, lemon and soft green.

glamorous-pastel-christmas-decor-ideas-1.
Image from http://godfatherstyle.com/22-pastel-christmas-decor-ideas-to-add-glamour-to-your-home-decorations/

Jewel – Red, gold, green, blue, purple.

img_0465
My Jewel Theme Christmas Tree

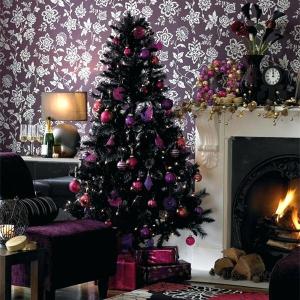
Galaxy – Metallic blue, green, purple and pink.

black-xmas-tree-black-tree-with-style-black-xmas-tree-decoration-ideas
Image from https://secretgram.me/black-christmas-decorations-36-super-elegant-black-and-gold-christmas-decor-ideas/38-black-christmas-tree-decorations-ideas-decoration-love-black-christmas-decorations/

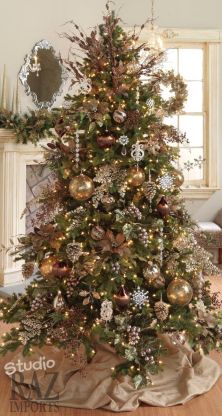
Retro – Bronze, gold and metallic brown.

jyu_tree
Image from https://www.pinterest.co.uk/pin/294634000619291224/

Elegant – Black, white and silver.

black-christmas-tree-decorating-ideas-3
Image from https://www.lushome.com/black-white-christmas-tree-decorating-ideas/128351

Once you have chosen your theme and colour palette you can then choose the colour of your tree, and with so many different colours and styles to choose from sometimes it can be hard to know which colour to go for.

Once you have decided on the best tree for your theme the next thing to decide upon is the lights for your tree.  There are 4 main ones to choose from – coloured, cool white, warm white and bright white.  Coloured are the more traditional sort of fairy lights with bulb colours of red, green, blue and yellow, cool white give off a blue tinged light, warm white lights are yellow toned and bright white lights give off a brilliant white light.

I would choose Coloured lights for the Bright and Retro Theme

Cool White lights work well with the Pastel and Galaxy Theme

Warm White lights work well with the Traditional Theme

Bright White lights work well with the Minimalistic, Jewel and Elegant Themes.

Now that you have chosen your theme, tree and lights we can now look at the fun stuff – all the shiny baubles and other decorations to hang on the tree!!!!  First though, you should decide whether you want tinsel on the tree or not?  I personally dislike tinsel, having Aspergers means I can be hyper-sensitive to certain smells and tinsel is one of those things that I don’t do well with smell wise so I choose not to use it at all.  However, there are alternatives to tinsel including beaded ropes which come in many different colours, marabou feather trim, ribbons and other haberdashery trims works well too and you can buy that in many fabric or craft shops.  Whatever you decide on pick out one colour from your colour palette so as not to overwhelm the other decorations.

Choose big baubles in one colour from your palette and add smaller ones in either the same colour or another from your colour scheme, mix up finishes to add interest (choose shiny ones, matte ones, glitter finish, dimpled etc) and if you want, mix up the shapes of the baubles – tear drop ones work really well for the bottom of the tree where as I find round ones work well for the middle.

Select smaller baubles in differing colours (that match the colour palette of your chosen theme), again you can choose different finishes and textures.  Smaller baubles work well for the middle of the tree and top. Most of the large and small baubles can be bought in multi packs and are fairly cheap to buy so you can add as many or as few as you wish to your tree!

Now for the extra fun bit, choosing the eye-catching elements!  These elements are things like bows, shaped baubles, clear baubles, and baubles with special finishes.  Most of this type of decoration are the ones that are sold as single decorations (and are a bit more expensive than the regular baubles) and are designed so that you only add one or 2 of the same one to the tree, this means that the eye will be drawn to them, add a fun element and are a way to really personalise your theme.  Most places that sell trees will sell this type of decoration, I have found Asda and B&Q to be good places to have a look as they carry a good range!  Whatever you choose, have fun with these decorations and add as many or as few as you wish!

What sort of theme are you choosing for your decorations?

Pantone Colour Of The Year 2019

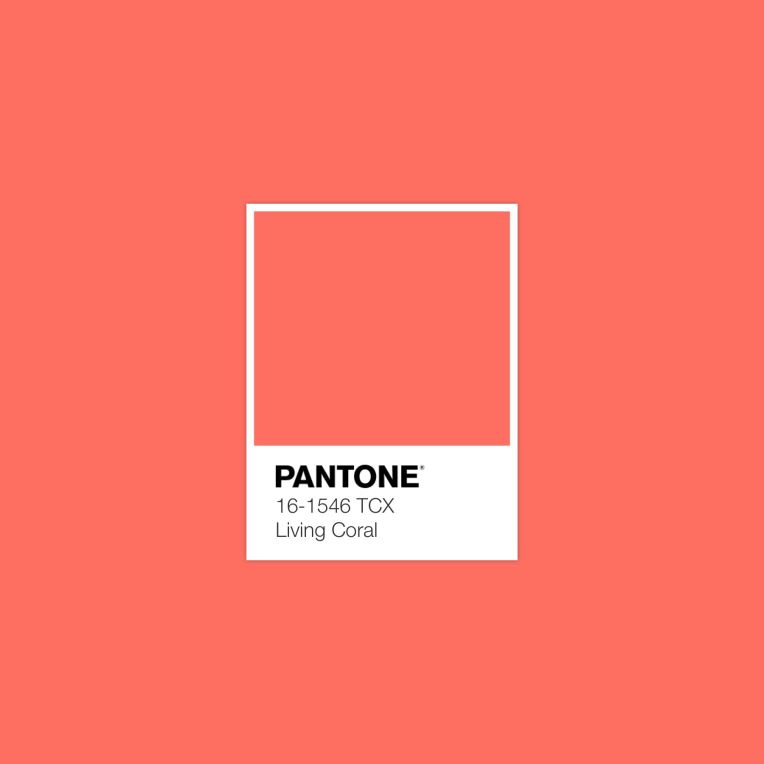
Pantone have just released their colour for 2019…. Living Coral (16-1546)!

aab8fe18634aa26e084b5015114849d4

Taken from the Pantone website

“Vibrant, yet mellow PANTONE 16-1546 Living Coral embraces us with warmth and nourishment to provide comfort and buoyancy in our continually shifting environment.

In reaction to the onslaught of digital technology and social media increasingly embedding into daily life, we are seeking authentic and immersive experiences that enable connection and intimacy. Sociable and spirited, the engaging nature of PANTONE 16-1546 Living Coral welcomes and encourages lighthearted activity. Symbolizing our innate need for optimism and joyful pursuits, PANTONE 16-1546 Living Coral embodies our desire for playful expression.

Representing the fusion of modern life, PANTONE Living Coral is a nurturing color that appears in our natural surroundings and at the same time, displays a lively presence within social media.”

What this means for fashion, beauty, interior design, home furnishings, accessories….

Be prepared to see this shade incorporated into every day life, wether it be a splash of this colour gracing our sofa in the form of cushions or a blanket in this hue, in the kitchen with accessories matching the colour, in our outfits with patterns displaying the tone or in our make up with lip, cheek and eye colours matching the colour.  This colour will add impact to anyones room that is already painted a trendy shade of grey, add a pop of colour to a workspace, add interest to an outfit and so much more!  I’m really excited to see where people take this colour!

My thoughts on Living Coral – the Pantone Colour of the Year

As soon as I saw the colour, before even knowing what it was called I loved it.  It is a colour that evokes happy memories from childhood, is comforting and warm, bright without being too loud or overpowering.  I really love it and am already thinking of ways I can use the colour in my day-to-day life.

What are your thoughts on the Pantone Colour of the year?

An Alternative…Advent Calendar

I don’t generally buy advent calendars as, although I love the idea of them I always find the ones on offer either expensive for what you get or disappointing.  I really wanted to get one for Sam as part of his Christmas gifts but decided to make one rather than buy anything.

I decided on creating a memories advent calendar, basically a note for each day of December contained in a numbered envelope that the recipient can open on each day of advent.

I bought cards from Tiger that came in a cute box, listed some memories that I wanted to share and started to write the cards.  I labelled the envelopes from 1 to 24 then shuffled the cards and inserted them into the envelopes.  I then used the box to put the cards back into so I could give them to Sam.

img_0400img_0416.jpgimg_0402img_0416img_0417.jpgimg_0415.jpgimg_0417

It was really nice to spend a day reminiscing about favorite memories and writing them down, the only problem I experienced was which memories to choose!!!!

I think this would be a perfect gift for anyone that means something to you whether it be a friend, family member, brother, sister or child.

Have you made an alternative advent calendar for someone?  What did you make?

Mind Crafternoon

img_0675.jpg

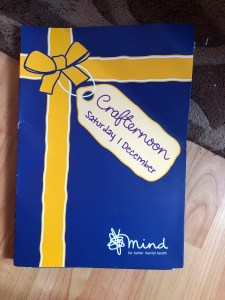
On Saturday I held a Crafternoon –  a crafting afternoon, in aid of Mind, the mental health charity.  I chose to host the crafting event because Mind, while I have not used all of their services, have found their on-line resources to be really helpful and informative.  1 in 4 of us, in our lifetime will experience some kind of mental health problem and its charities such as Mind that can help when these problems arise.  I believe that Mind do a really good job offering support, advice and campaigning to improve services, raise awareness and promote understanding of mental health issues and wanted to support them to continue to carry out the work that they do.

img_0682

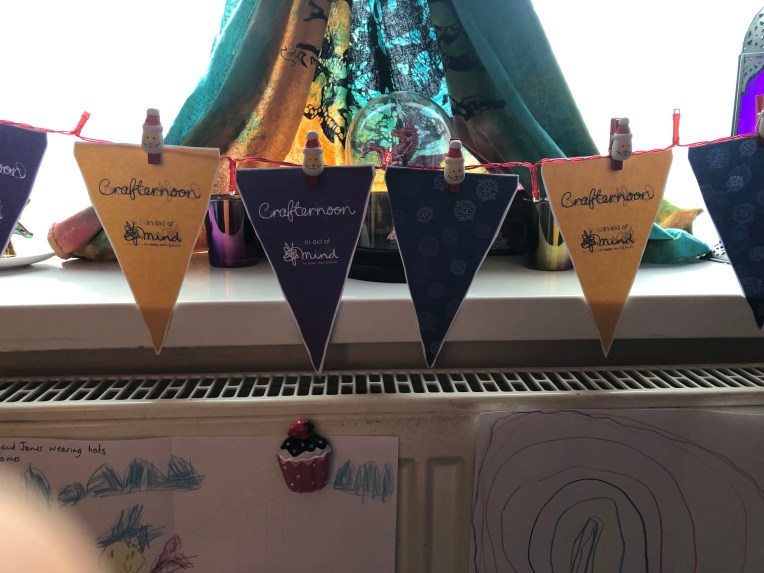
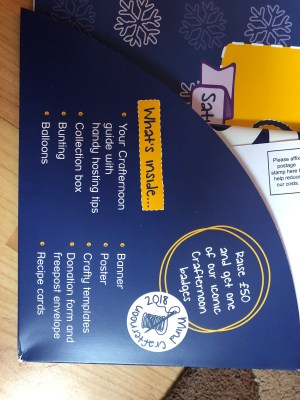
My Mind Crafternoon started with signing up for the event via the Mind website which was a really simple process of form filling with your name, address, email and the date of your Crafternoon (if it is to be held on another day aside from 1st December – the official Crafternoon date).  Once you have submitted your information Mind will then send out a kit that includes ideas of things to make including instructions, ways to raise money, bunting to cut out and make along with balloons and a money-box to keep the donations in.  They also supply the paying in forms for you to use when banking the money raised.  When I received my pack I was really amazed by how informative and helpful the pack was, there were so many tips and ideas so even the least crafty person would be able to hold an event like this!

img_0683img_0685img_0684

I first set up a Facebook event and invited some friends and then bought some notecards and invites, wrote a bit about Mind and my Crafternoon in the cards and wrote out the details of the party onto the invites then sent them out to the attendees the week before the event.

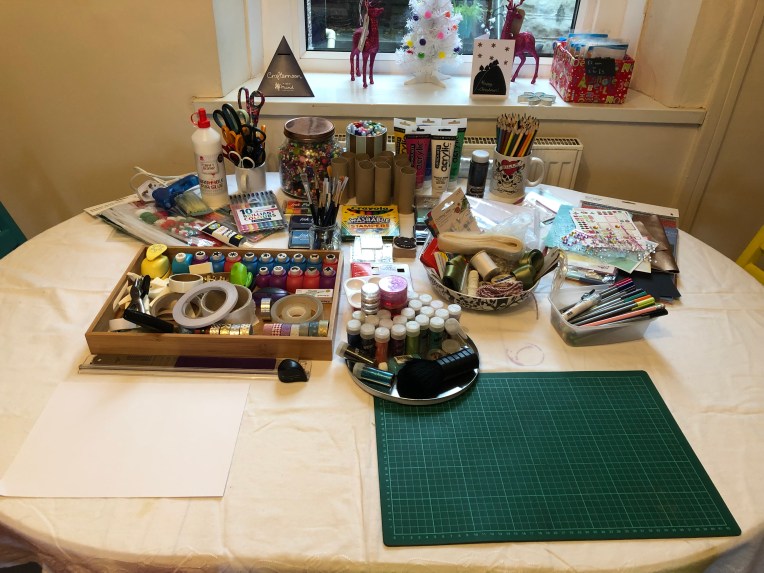
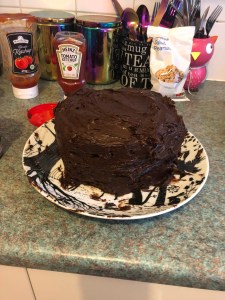
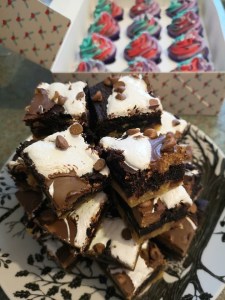
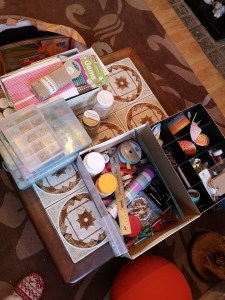
I then put my Christmas decorations up, dug out all my craft things and set them up on the table.  Sam and I baked a Vegan Devil’s Food chocolate cake and my friend Jez made some cakes and things for my event too.  My lovely neighbour, Heather, made earrings and wine glass charms to sell and I had some sets of nails that I’d decorated to sell as well so we could raise extra money for Mind.

img_0679The Vegan Devil's Food Cake Sam and I madeimg_0663img_0664img_0665

I decided to have a raffle, originally I was going to buy a tub of chocolates to raffle but decided to make a Christmas Mulled Wine scented soy candle to raffle instead.

img_0522

The Activities

img_0666

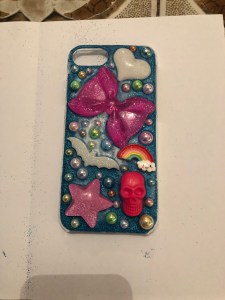
Jez showed us how to decorate compact mirrors and I decorated a phone case.  We used Mod Podge, glitter and 3d elements such as bows, flowers and pearl flat back beads to decorate them.  I’d never done this before and it was really fun!  Everyone got stuck in and it was really lovely to see how each persons style and taste came out when we all used similar elements in our work.

img_0668img_0669

Everyone’s work looked really fab and I think everyone was really pleased with the outcome!  I know I’m super happy with how my phone case turned out!  Jez was a really good teacher to have!

I led a Snowflake Making Masterclass using white paper, double-sided sticky and scissors to make 3d snowflakes.  It was fun to be able to share what I’d learned with my friends and see how happy they were to have been able to make something so lovely from simple sheets of paper.

img_0578img_0585img_0586img_0593

img_0638

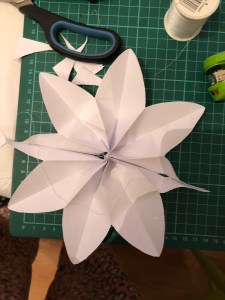
I then showed my friends how to make paper Christmas flowers from folded paper, scissors, a stapler and cotton thread.  They all agreed that it would be something fun that they could do with their children as a Christmas activity.

img_0567

And finally I did a brief demonstration showing everyone how to make Christmas Snowflakes and trees from toilet roll tubes.

It was a really fun day, there was a lot of chat and getting to know each other, laughter and fun, cake eating and wine drinking!  I think I will definitely be hosting another one in the future!  In fact I’ve already started thinking of different Crafternoons I could hold and the sort of themes that I could base them on!

This Month On The Blog!

img_1380

This month I have a bumper lot of Christmas posts to share with you!  I have been busy making things, researching, writing, photographing and compiling ideas, hints and tips on all things Christmas related!

You can expect to see posts about

The Crafternoon event I held in aid of Mind

An Alternative Advent Calendar

Christmas Decoration Ideas – from making your own decorations, how to decorate your table and little touches to add to give an extra special touch.

I will be writing about food ideas to serve on the day, how I decorate my home for the Festive Season, DIY ideas for gifts, my own Christmas Wishlist, preparations for the day itself and ideas on how to relax.

After Christmas Day I will be sharing how I spent the day!

I hope you will enjoy reading the posts as much as I have in researching and writing them!!!

Mental Health And Me – An Update

This is the first update about my mental health since writing this post, and in the time between that post and this I’ve been to the doctors for a medicine review on the 22nd November.  Thankfully some of the symptoms that I had when starting my medication (Sertraline 50mg) have subsided, the sick feeling still comes and goes but isn’t a persistent feature of day-to-day life, the hot and cold feelings have gone, and the dizzy spells are getting less and less which is good.
I’ve now developed insomnia, which I do get from time to time but never like this, over the space of a few weeks I have not been able to sleep for more than half an hour at a time if at all which is really starting to get me down.  The flip side to this is that when I do sleep, I can sleep for the whole day which has happened a few times now (the latest being sleeping through the whole of sunday 25th November).

I have still been feeling anxious and still have these anxiety attacks along with panic attacks though I can not identify a reason why, perhaps if I could then I would be able to stop them?

I spoke with the dr about all of this, he said it may help to up my medication.  I’m now taking 100mg of Sertraline each day.  I still feel unable to go back to work, mostly because my concentration levels are still really low and I keep forgetting things (like when watching tv, the adverts will come on and I have no idea what I have been watching), I still can’t settle to read a book and I’m finding myself really tired even when I have had a good nights sleep.  All of these things create a frustration in me and I know I would find it difficult in work with these symptoms, and I would end up being angry at myself for not being able to carry out the tasks I need to, taking too much time over completing tasks and generally struggling with the day-to-day things I need to do.

I’m finding it pretty hard to motivate myself to leave the house or even have conversations with people.  I feel like I’ve become a bit of a hermit at the moment.  I did manage to go food shopping at 12:30am on the 21st November…the Asda supermarket by me is open 24 hours and because I couldn’t sleep I decided to put that time to good use.  The supermarket was really quiet with only myself and shelf stackers around.  I got to walk around at my own pace and pay attention to what I was buying.  Usually, if I go in the day time I run around like I’m on supermarket sweep, grabbing things and not thinking about what I need or want in order to get out as fast as I can.  This time I only bought what I needed and didn’t forget anything.

I’ve been taking the higher dosage of medication for the last 3 days and so far have not got any more, or bought back any of the side effects I was experiencing.  I just hope that these will help somewhat!